
Creating an affiliate program on your WooCommerce site provides you with lots of benefits.
Not only can it substantially increase the amount of revenue that is generated by your site, but it can also significantly improve search engine optimization (SEO).
While there are a number of ways that you can add an affiliate program to your WooCommerce site, the best solution IMHO is AffiliateWP.
AffiliateWP costs a bit more than the normal affiliate plugin but if you are looking for the best affiliate plugin I highly recommend choosing AffiliateWP. How come? Well if you choose the Professional plan you get access to the Affiliate Portal addon which is basically a super professional affiliate dashboard that automatically integrates inside your current WordPress site.
In this article, I will show you how to install and set up AffiliateWP on your WooCommerce site.
But if you are more of a visual learner, feel free to watch this video instead (over 15,000 views):
How to setup a WooCommerce affiliate program?
Before You Begin
Before you set up AffiliateWP on your WooCommerce site, you should develop a plan of action for operating your affiliate program.
First, you should come up with a way of seeding it. A good way of doing this is by contacting a couple of fellow site owners and seeing if you can get them interested in becoming an affiliate.
Then, after you have signed up a few affiliates and have smoothed out any kinks in the program, you can open it up to the general public.
You also need to decide how new affiliates will be added to your program. You can automate the process, by including a registration form on your site.
Or you can make the process an entirely manual one, in which there is no affiliate registration on your site. Instead, you manually add affiliates.
Installation
To install AffiliateWP, do the following:
- Purchase AffiliateWP
- Download the plugin from your account.
- Go to your WooCommerce dashboard. Then, from the Plugins menu, select Add New.
- From the Add Plugins page, click Upload Plugin and afterward click Choose File.
- Select the file that you just downloaded and click Open. Then, click Install Now.
- Finally, click Activate Plugin.
Pro tip: There are three pricing levels of the plugin: Personal, Plus, and Professional. If you use WooCommerce Subscriptions and want to give recurring referrals, you must choose the Professional option. You will also need this option if you want to do automated payouts through PayPal or if you want to enable the Affiliate Portal Dashboard.
Configuration
The first thing that you need to do in order to configure the plugin is input your license key. You can get your key by logging into your AffiliateWP account and clicking Licenses.
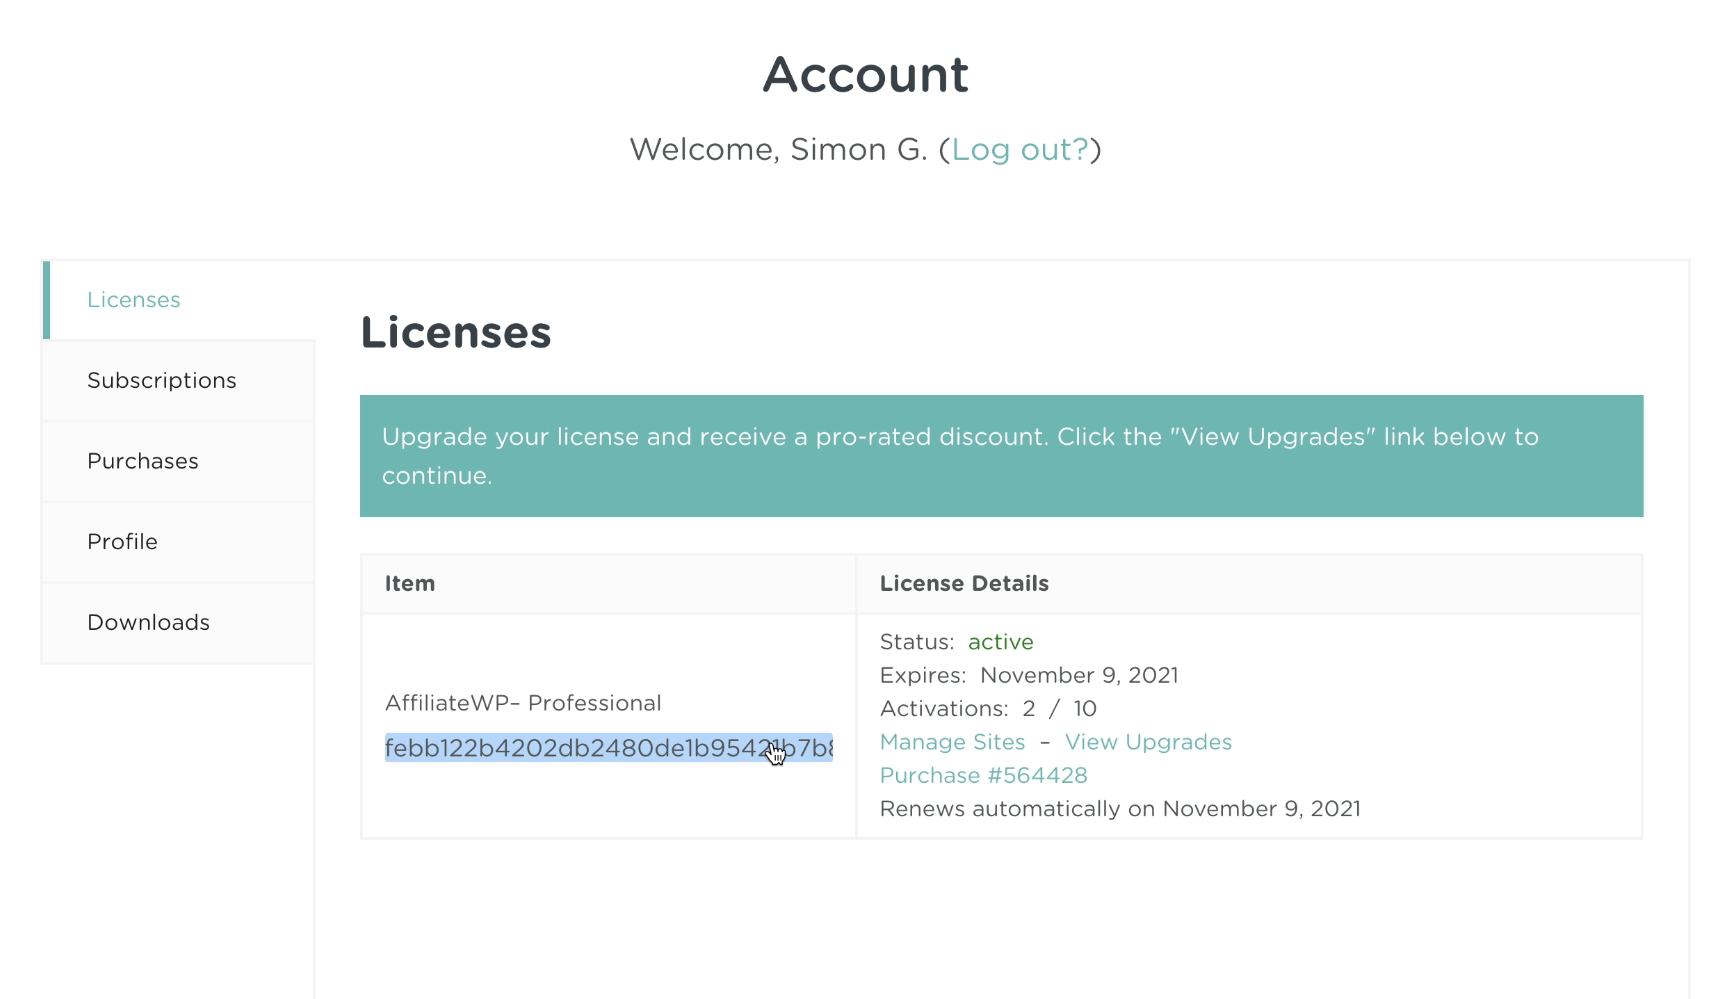
Then, select the key and copy it to the clipboard.
Back in WordPress, click Affiliates from the WordPress dashboard and select Overview.
Afterward, click the Settings menu option and, from the General tab, paste the license key into the License Key field.
Then, click the Activate License button.
Next, click the Integrations tab and click on WooCommerce.
You can also integrate the plugin with any other WordPress extensions that you use, such as Gravity Forms and Contact Form 7.
Then, click the Save Changes button.
At this point, the plugin has created an Affiliate Area page that your affiliates will view when they want to get referral codes and other information about your affiliate program.
To view this page, click Pages from the WordPress dashboard and hover over the Affiliate Area Page. Then, click View.
The Affiliate Area page will then display.
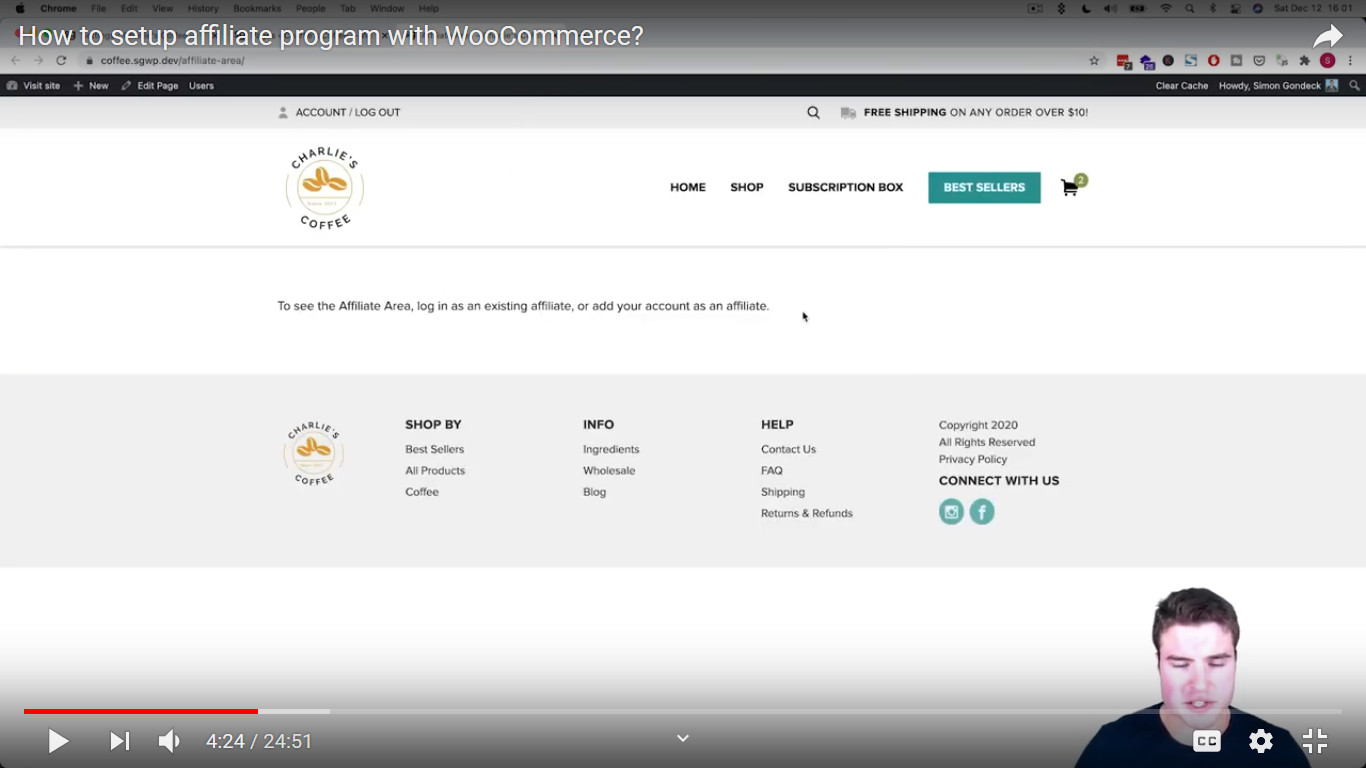
At first, you will get an error similar to the one above, as you haven’t yet created any affiliates, so no affiliate is currently logged in.
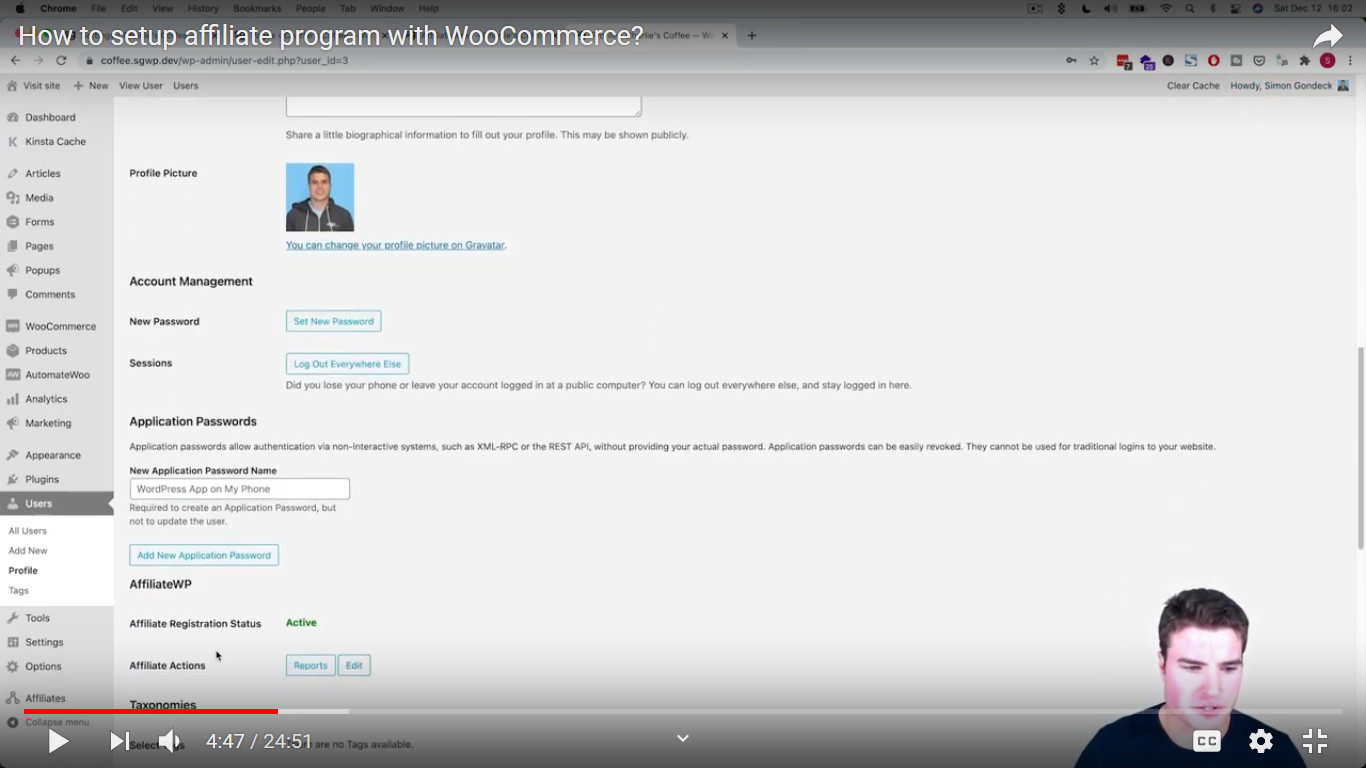
For testing purposes, the first affiliate that you should add is yourself. You can do this by editing your user profile in WordPress and going down to the AffiliateWP section.
There, activate your Affiliate Activation Status.
Now, when you return to your Affiliate Area page and refresh it, you will see your affiliate area:
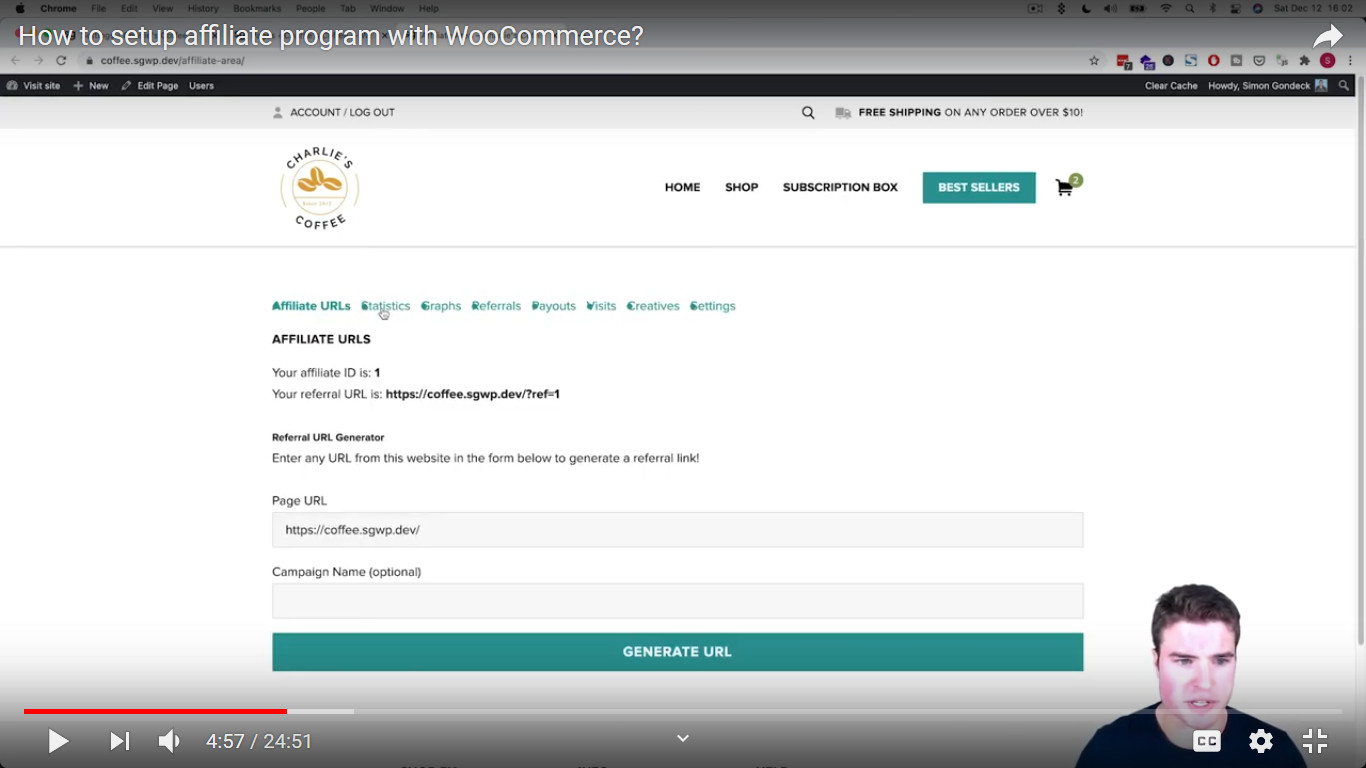
Here you can get a referral link to your site for this particular affiliate. Affiliates can also generate a URL for any page on your site by entering this page in the Page URL field and clicking the GENERATE URL button.
On the Affiliate Area page, affiliates also have options for statistics, graphs, referrals, payouts, visits, creatives, and settings.
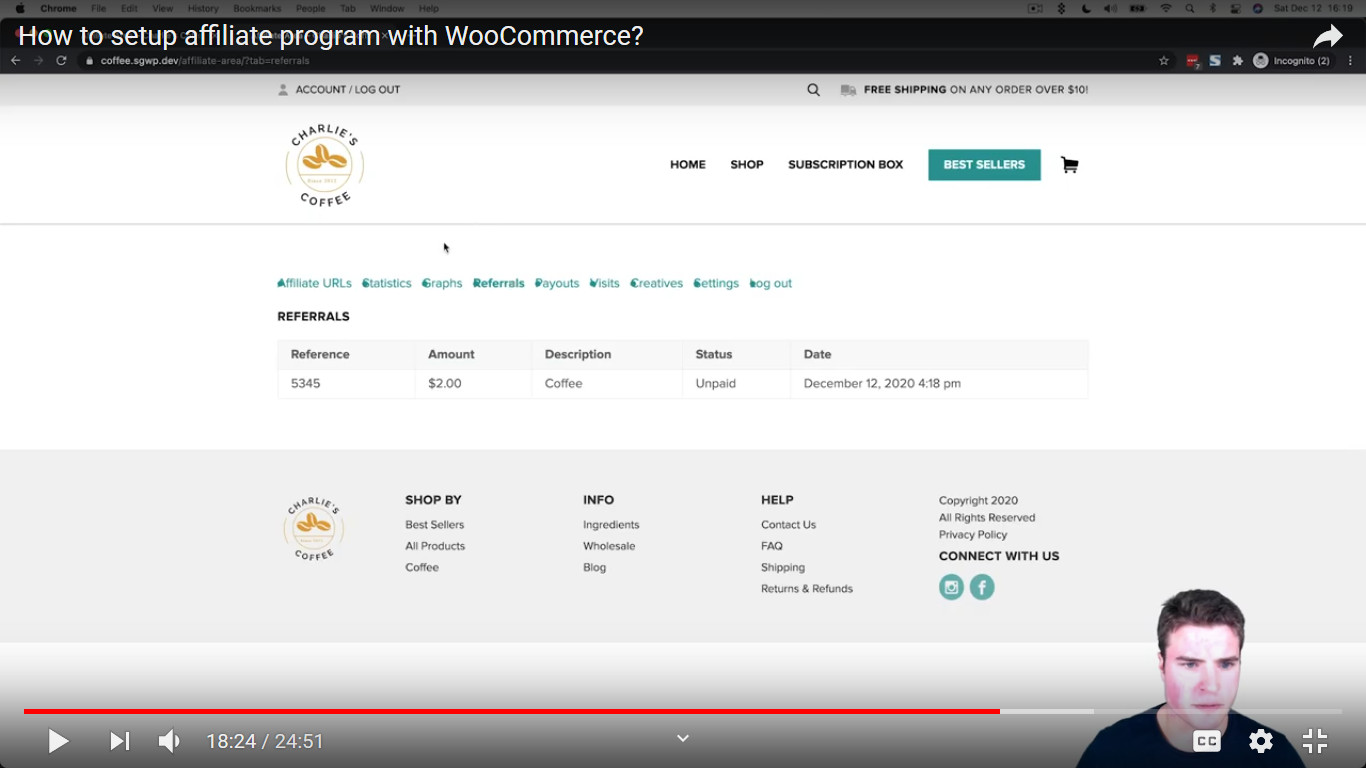
The most important option here is Referrals, where affiliates can view a list of the sales that they referred:
Once you’ve set up the Affiliate Area page, go back to the Settings page and click the General tab. The important fields to enter here include the following:
In the Terms of Use dropdown list, select the page that describes the rules of your affiliate program. In the Referral Rate Type field, select Percentage (%) if you want to pay affiliates a commission based on a percent of the sales that they refer. Select Flat [Currency] if you want to pay them a fixed amount of money for the sales that they refer. In the Referral Rate field, enter your referral rate. You probably also want to click on both Exclude Shipping and Exclude Tax. In the Cookie Expiration field, enter the number of days a referral cookie will remain active in a user’s browser.
Next, you have to select whether you want to display both an affiliate registration form and a login form on your site or whether you just want to display a login form. You do this by selecting one of these two choices from the Affiliate Area Forms dropdown box.

Note: If you want both forms to appear on your site, you also have to click the Misc tab and click on Allow users to register affiliate accounts to themselves. If you do this, you probably also want to click on Require that Pending affiliate account must be approved before they can begin earning referrals.

When you are finished configuring the plugin, click the Save Changes button.
Approving Affiliates
If you allow affiliates to register on your site and require approval of them, your site will send you an email whenever an affiliate applies for an account.

Pro Tip: You can customize this email by going back to the Settings page and clicking on the Emails tab.
To review an affiliate application, click Review pending applications. The Affiliates page will then display:
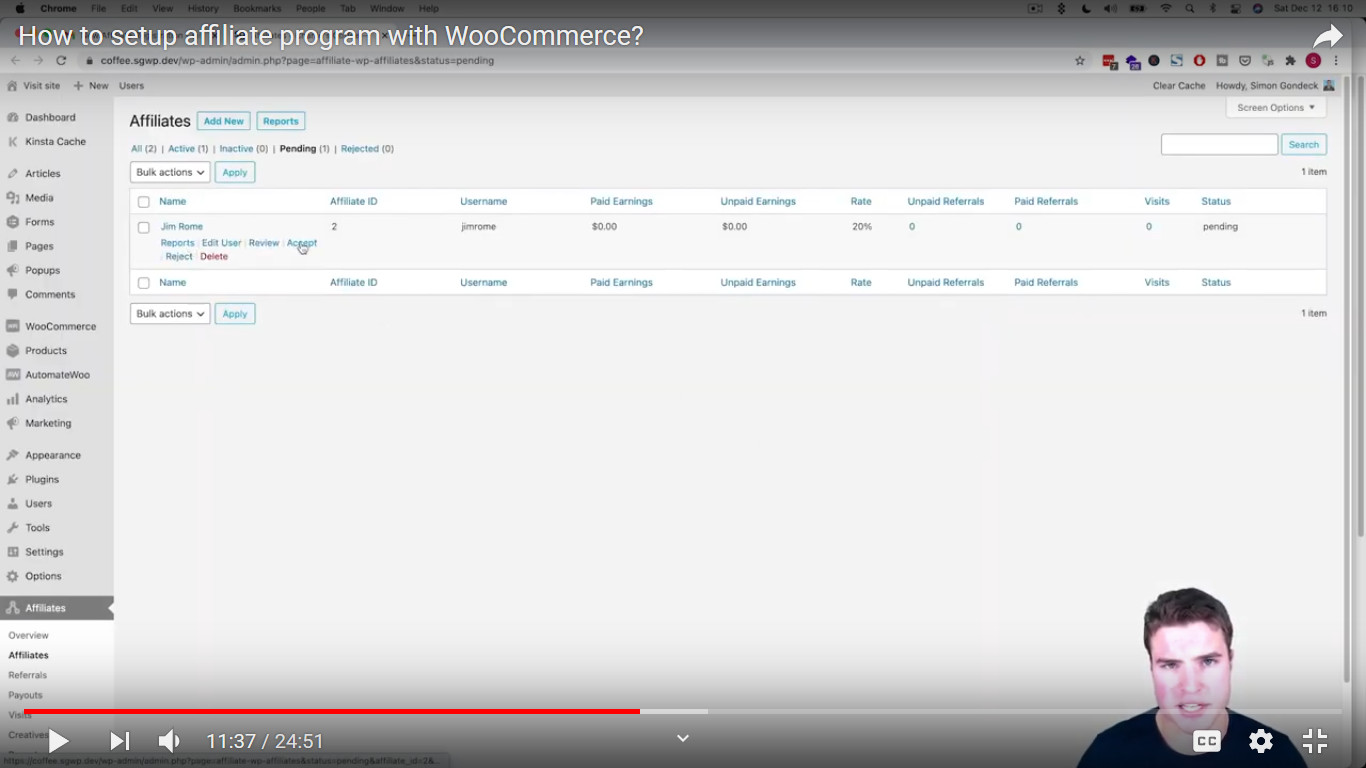
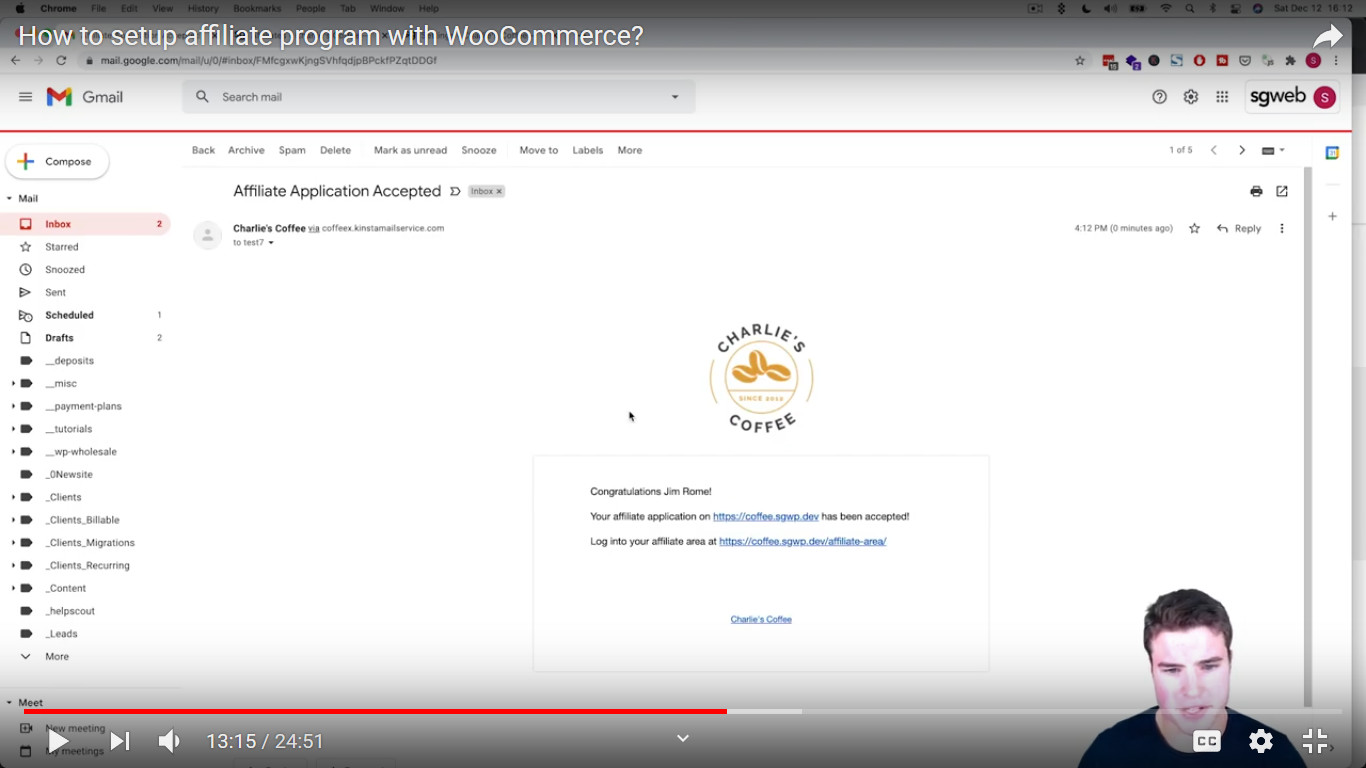
To approve an applicant, hover over them and click Accept. Your site will afterward send the affiliate an approval email, which will include a link to the affiliate login page:
Adding Creatives
In addition to referral links, you can provide your affiliates with creatives, which will allow them to add graphically-pleasing elements to their pages that will link to your site.
To add a creative, select Creatives from the Affiliates menu. The Creatives page will then display:
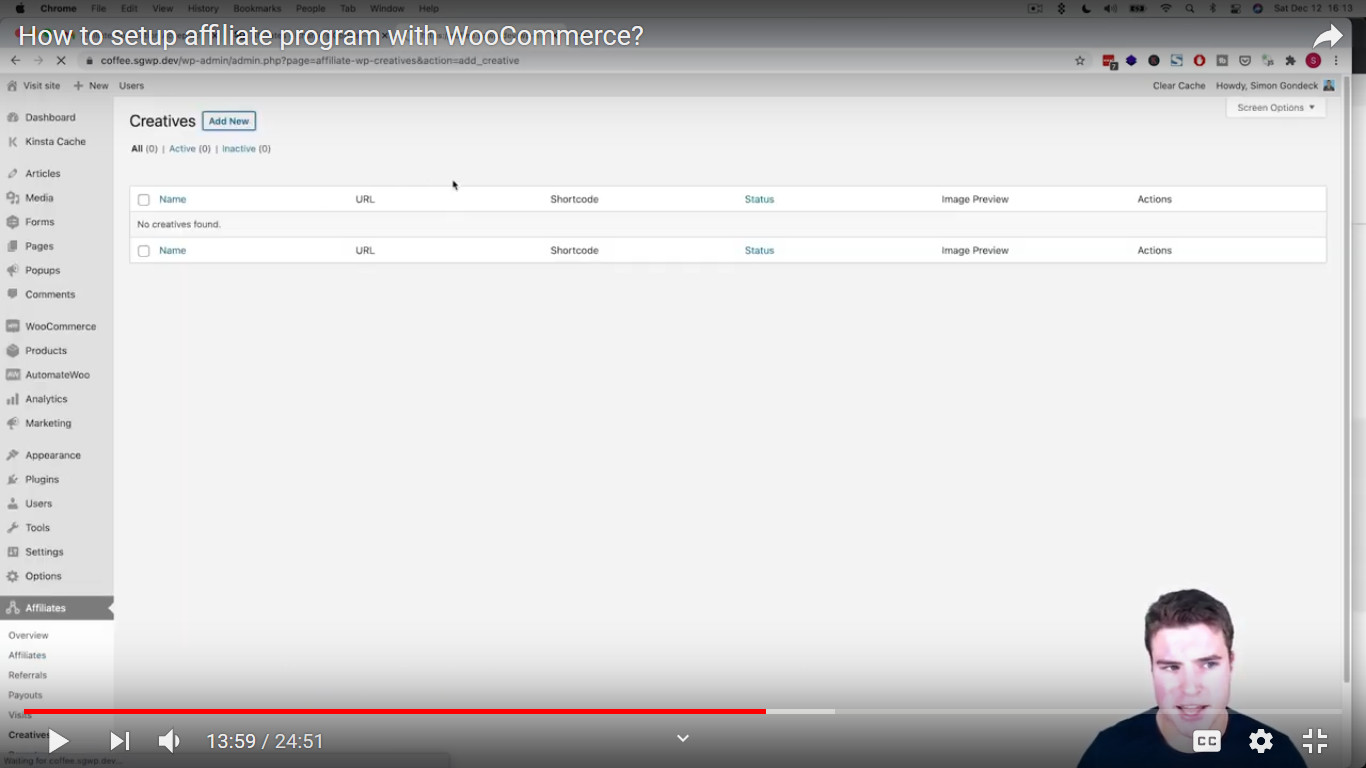
Click the Add New button, and the New Creative page will display:
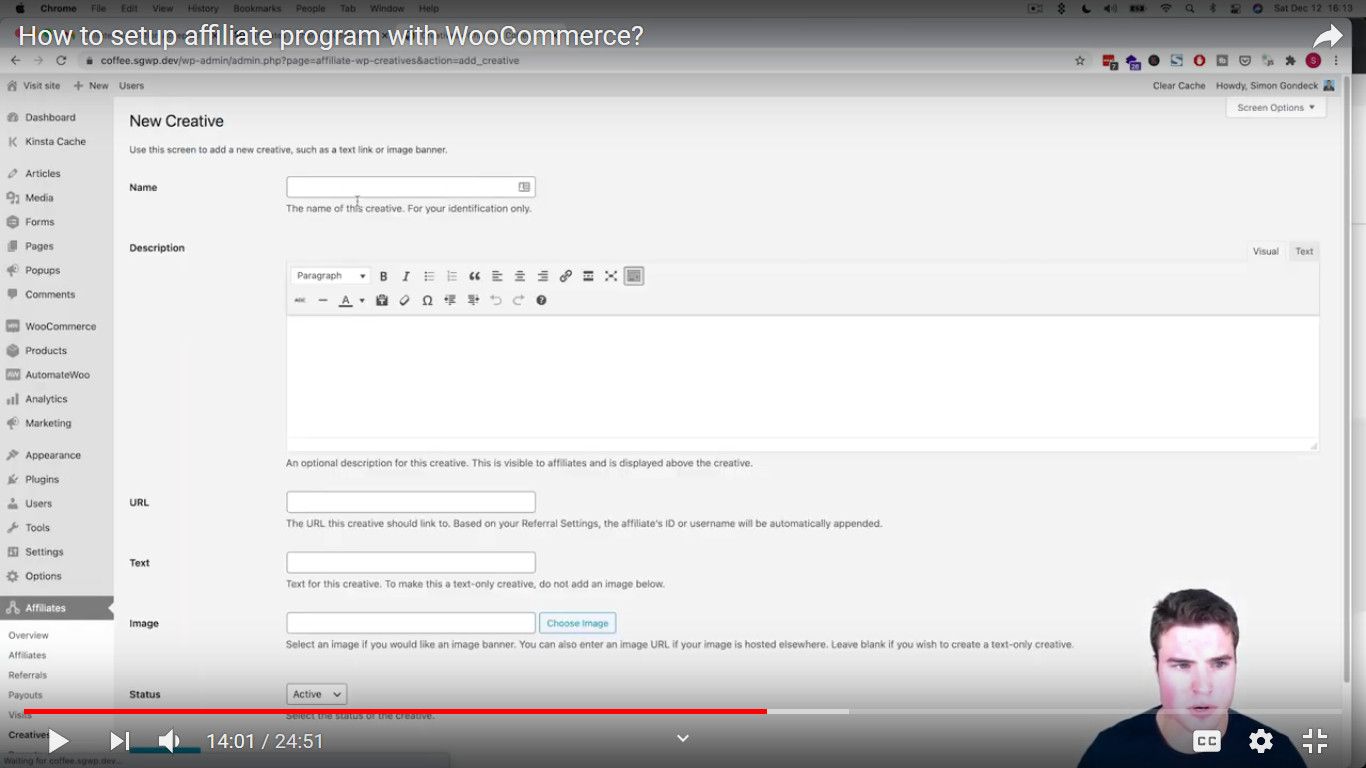
In the Name field, enter the name of this creative. In the Description field, enter the description of this creative. In the URL field, enter the address of the page where users will be sent after clicking on the creative. In the Image field, select the graphics for this creative.
To use this creative, the affiliate would go to their Affiliate Area page and click the Creatives menu option.
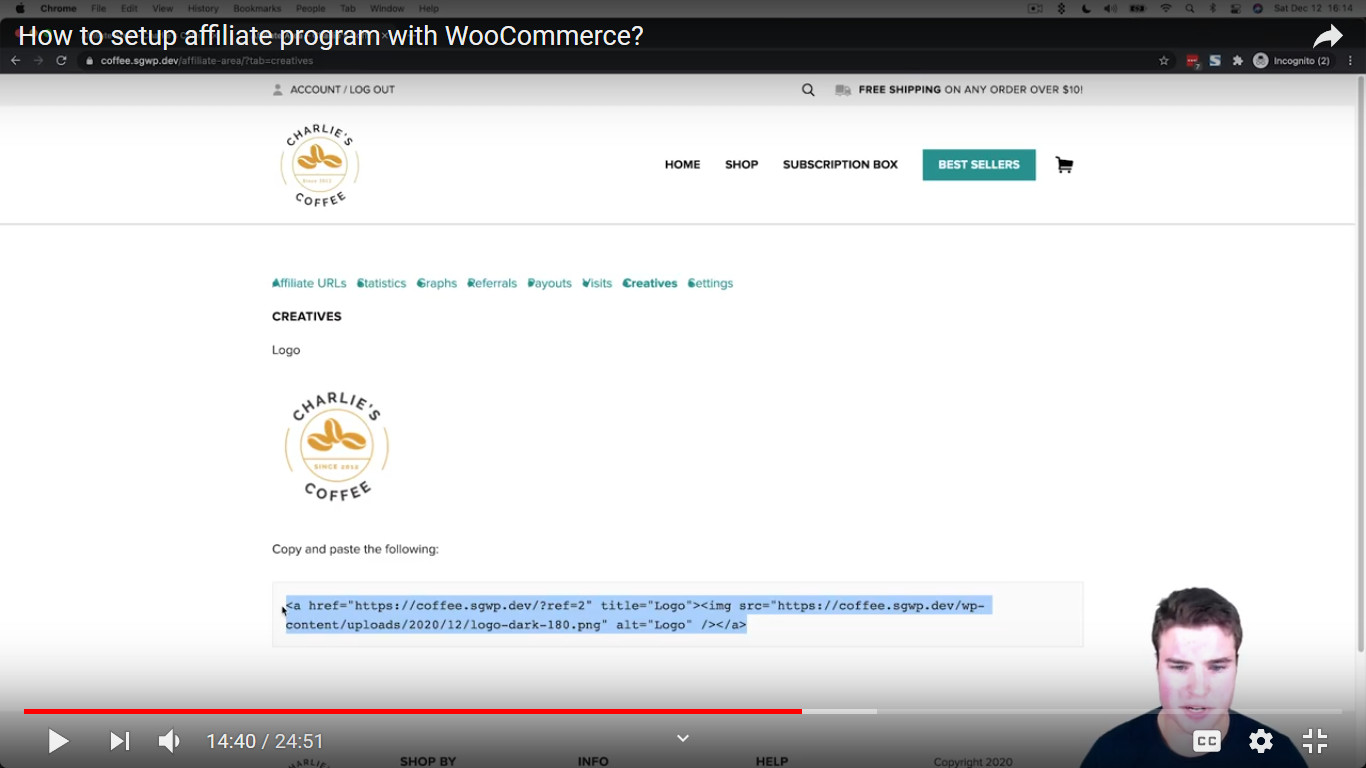
Here they can copy a link to the creative that includes their referral code.
Viewing Referrals
To view which affiliates referred orders, select Orders from the WooCommerce menu. The Orders page will then display:
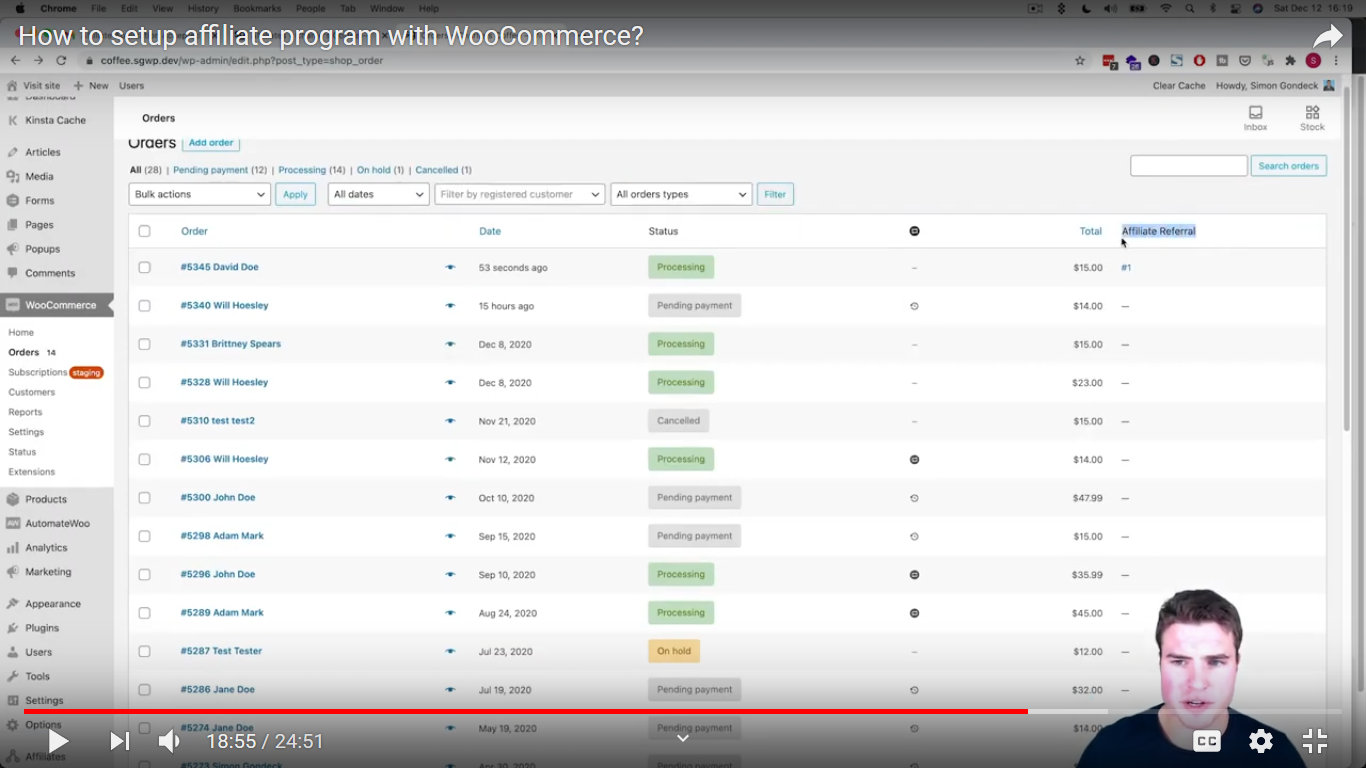
You will see the affiliate ID of the order’s referrer in the Affiliate Referral column on the far right-hand side of the page.
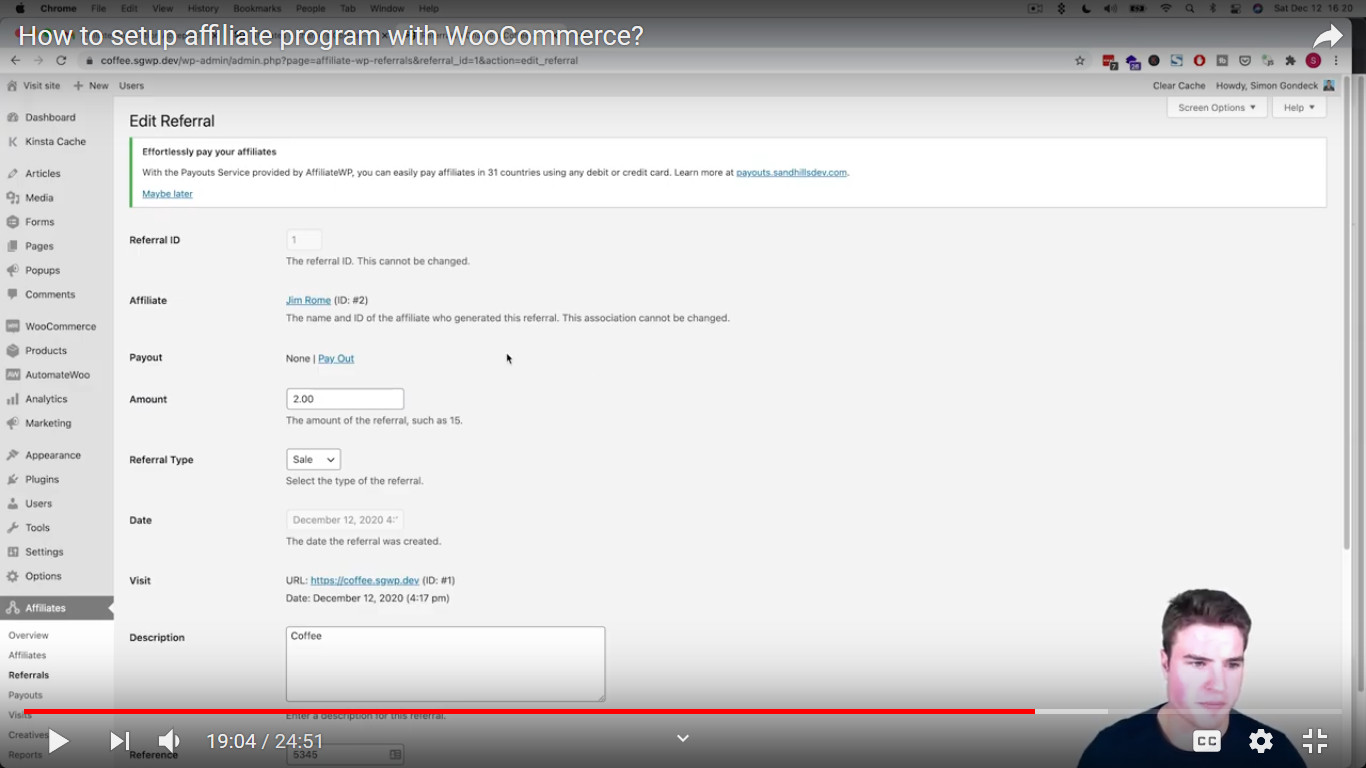
If you click the ID of the affiliate, the Edit Referral page will display information about the affiliate:
You can also view information about a referral by looking at the order notes inside an order.
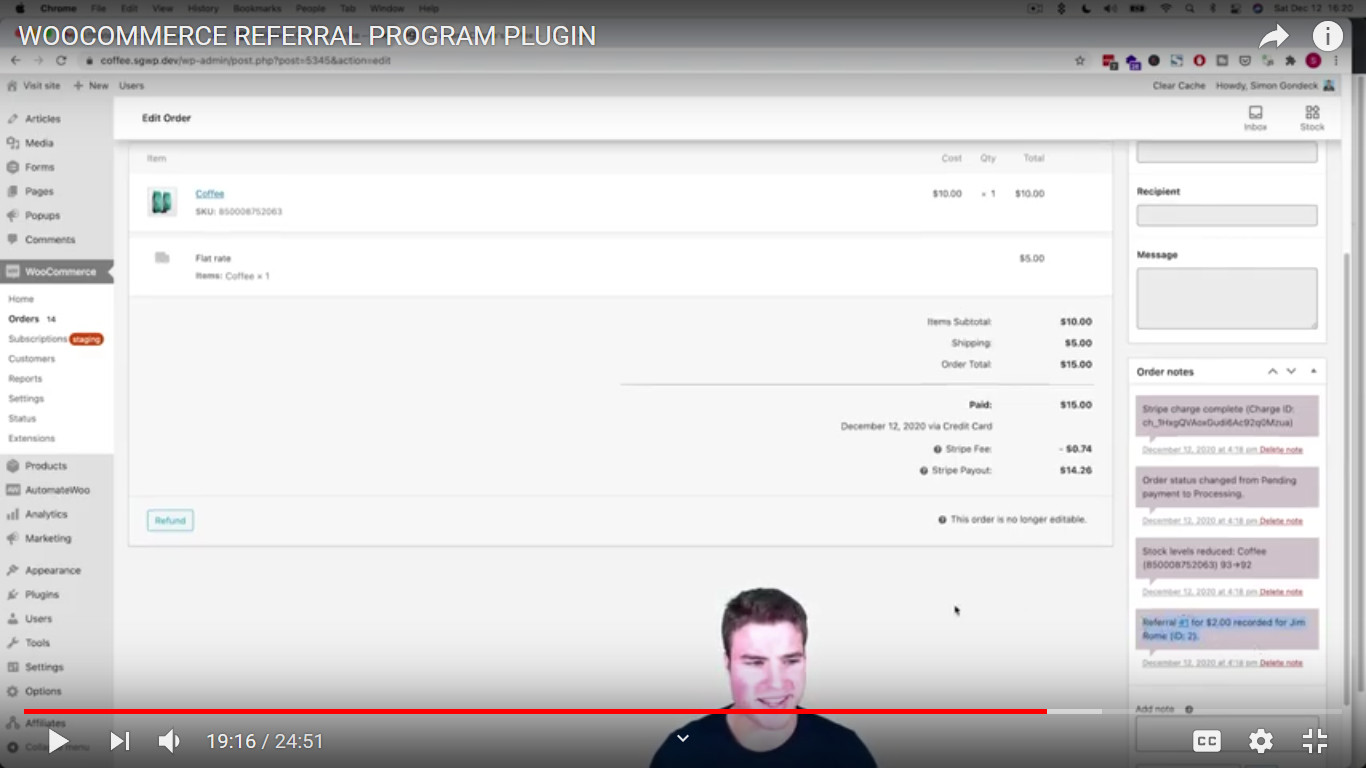
Details about the referrer will display in the Order Notes section on the right-hand side of the page.
Using the Affiliate Portal Dashboard
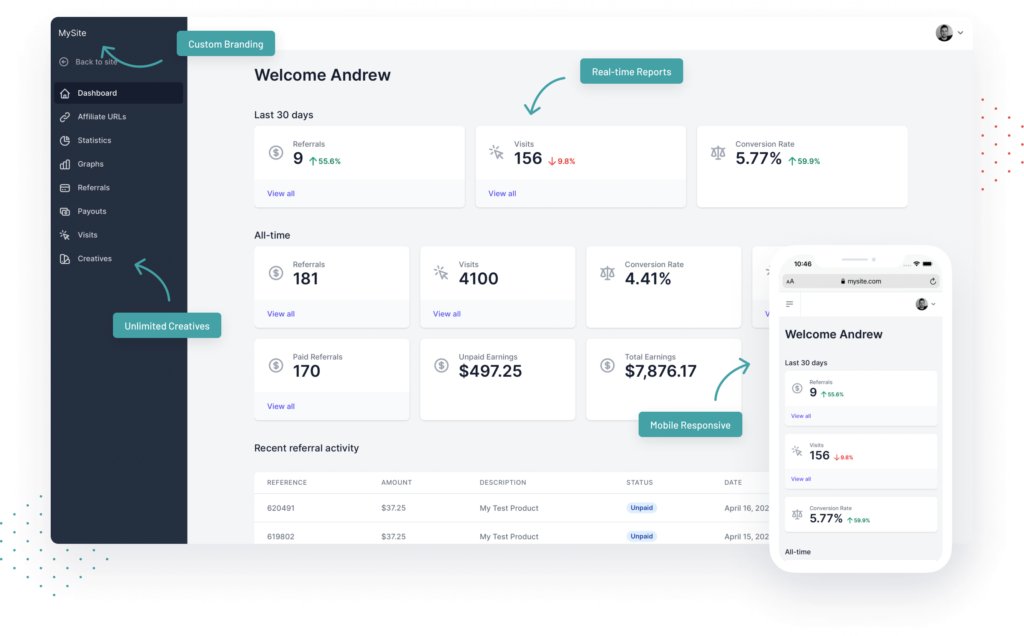
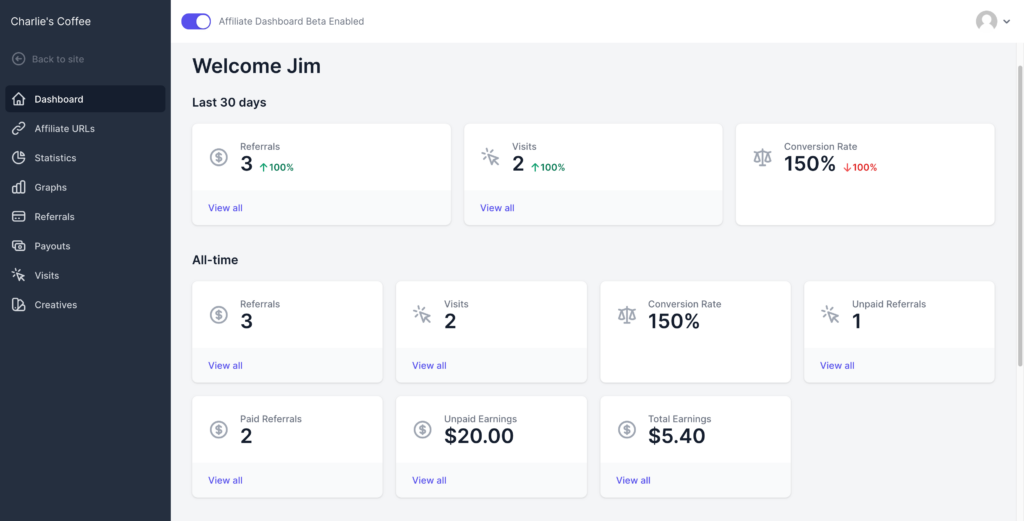
If you have the Professional version of AffiliateWP, you will get access to the Affiliate Portal addon, which is a complete game changer!
To use this dashboard, you must first install it, as it exists as a standalone plugin that is one of AffiliateWP’s many add-ons. To do this, you need to go to your AffiliateWP account and download the Affiliate Portal addon. Next, upload it to your site.
The Professional Dashboard will then display! For reference, check it out below!
Setting Up Recurring Referrals
If you are using WooCommerce Subscriptions and would like to pay your affiliates recurring commissions when they refer subscriptions to you, you need the Recurring Referrals add-on, which is only available to those who own the Professional version of AffiliateWP.
To Install this plugin, do the following:
- Log into your AffiliateWP account and download the plugin add-on.
- Go to your WooCommerce dashboard. Then, from the Plugins menu, select Add New.
- From the Add Plugins page, click Upload Plugin and afterward click Choose File.
- Select the file that you just downloaded and click Open. Then, click Install Now.
- Finally, click Activate Plugin.
Then, go to the Settings page from the Affiliates menu and click the Recurring Referrals tab.
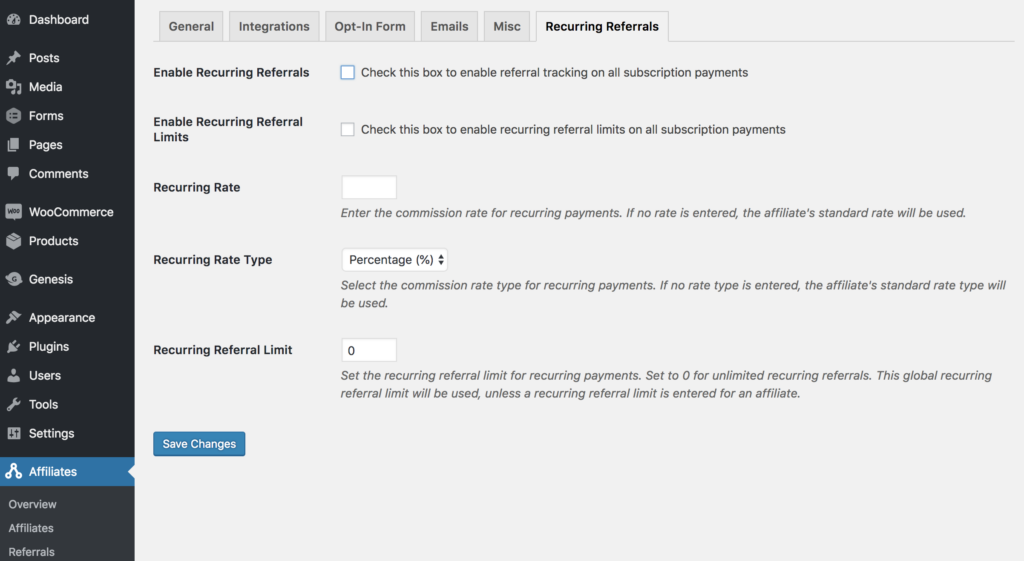
To enable recurring referrals, click on Check this box to enable recurring referrals on all subscription payments and enter the Referring Rate for subscriptions while selecting the Recurring Rate Type from the dropdown list.
Final Words
While AffiliateWP is not the only way that you can create an affiliate program for your WooCommerce site, when you consider all its powerful features, it’s likely the best. It’s also one of the most cost-effective solutions available.
If you have any questions about the plugin that weren’t answered here, please feel free to ask them in the comment section below.
Also feel free to add any pertinent comments that you have about the plugin.
Hi Simon,
Have you reviewed Affiliate for WooCommerce? I am trying to decide between that and AffiliateWP. I need something very easy to install and use (I am not IT, I just own a small business). Feedback from potential affiliates indicates that PayPal is often not what they prefer…is that true from your experience? And I can’t quite get a answer on whether Affiliates WP offers alternative payout options, the same for Affiliate for WooCommerce. Thanks
Hi Todd, apologies for the delay! AffiliateWP allows you to use Stripe or PayPal to payout your affiliates. In addition, you could also manually pay out your affiliates if you so choose. If I had the budget I would use AffiliateWP over Affiliate for WooCommerce just because of AffiliateWP’s Affiliate Dashboard addon that comes with all professional plans. This seriously is a game changer!