After reading this article, you’ll have a better understanding of how to setup and configure Google Analytics with your WooCommerce store.
You’ll notice that by using the WooCommerce Google Analytics plugin – as opposed to installing Google Analytics manually – you’ll have access to a lot of automatic features that will make your life much easier. Features including price calculations, cart tracking, and more!
We do realize that some of our readers are more visual learners, which is why we’ve created a tutorial video for your convenience (over 15,000 views)!
The WooCommerce Google Analytics Plugin: Benefits
When you first start out with a store on your WordPress website, it can be tempting to follow your gut. You’ve got a product you feel your potential customers want, sales are starting to come in, everything seems hunky-dory.
But the key advantage of doing business online is the amount of data generated. Do you know your customers’ average order value? How about their shopping behavior? What about individual product performance week-on-week?
Herein lies the benefit to eCommerce over traditional retail: detailed insights! Metrics! Reports you can automatically generate and analyze to find weak spots in your business! But how are you going to aggregate all that eCommerce tracking data?
That’s where the WooCommerce Google Analytics plugin comes in. With the free version, you can answer the questions that have been bugging you about your online store, including
- Search Insights: what are your customers searching for that brings them to your site?
- Channel data: are your product page visitors coming from social networks, email, search, or ad clicks?
- Understand your customers: are users who buy X product more likely to buy a complementary product than those who buy Y product?
- Sales funnel: are customers removing certain items from carts? How can you improve your conversion rate and sales performance?
But that’s not all! If your store needs enhanced ecommerce tracking functionality, there’s also a Pro Version, which adds features such as:
- User ID tracking for more accurate user counts
- Advanced eCommerce events tracking, such as coupon added/removed, cart page viewed, and so on.
- Reports for Checkout behavior
- Refund and cancellation tracking
Both plugins make use of Universal Analytics to track basic user data, pageviews, sessions, and events, as well as Enhanced eCommerce Analytics for basic eCommerce data.
They’re an essential part of any online store owner’s arsenal, so let’s take a look at how you can put them to use on your WordPress site.
How to add Google Analytics to your WooCommerce store
Step 1: Install the free WooCommerce Google Analytics plugin
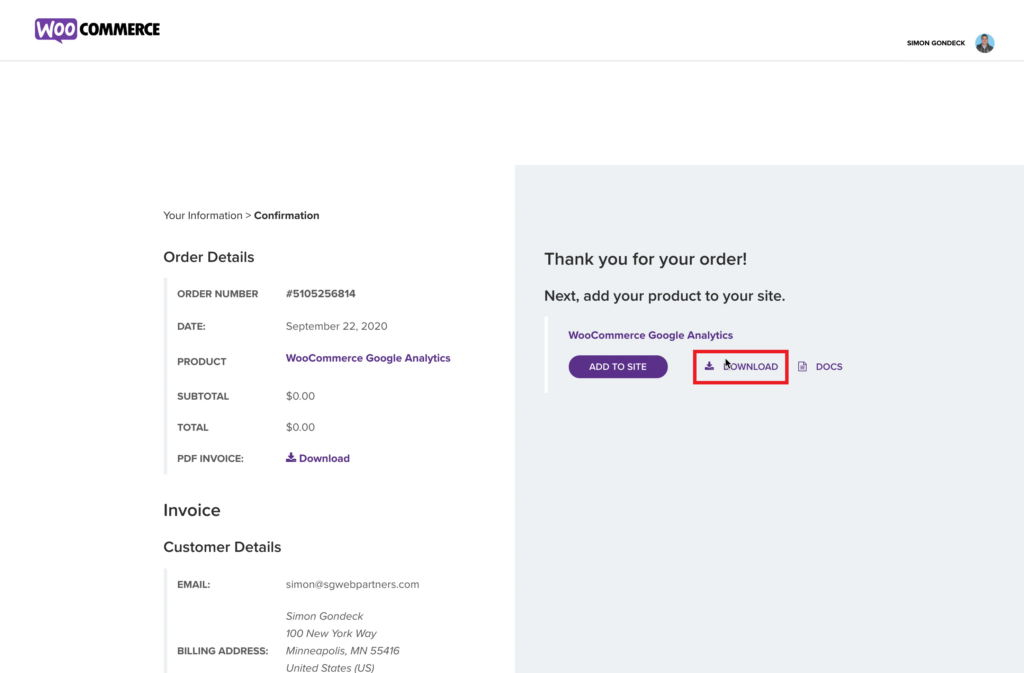
The first step is to purchase the WooCommerce Google Analytics (Free) plugin from the WooCommerce site for $0.00.
Once you have downloaded the plugin, you will be given a link to download the plugin zip file on the checkout page.
When you’ve downloaded the zip file, it’s time to install the plugin on your WooCommerce store.
From your WooCommerce Dashboard, click on Plugins and then Add New.
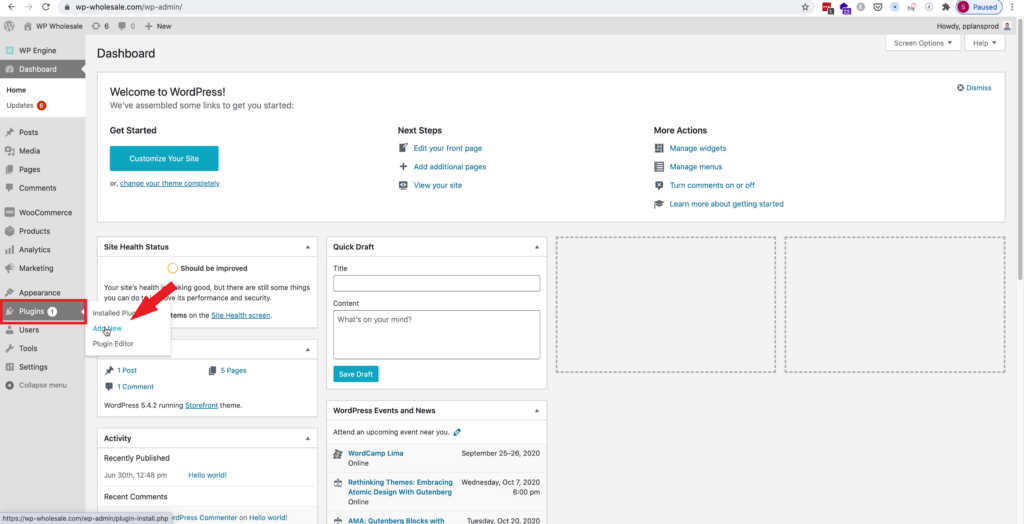
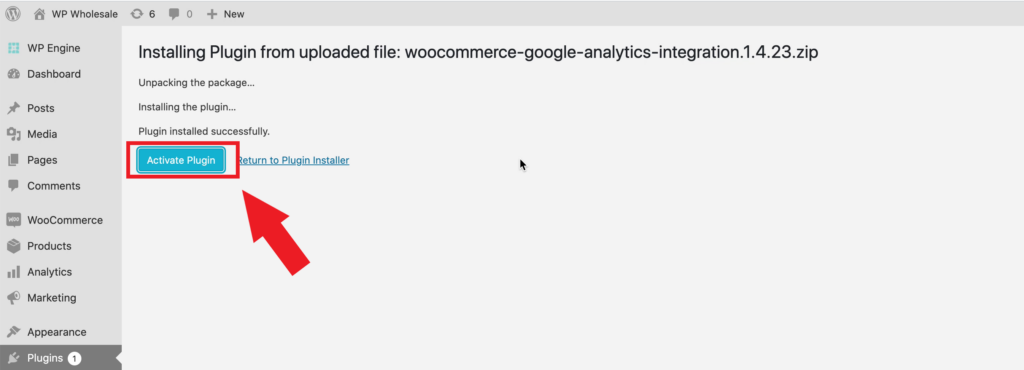
You should now be on a page that looks similar to the screenshot below. Click on Upload Plugin and then Choose File, where you’ll be given the chance to open your WooCommerce Google Analytics (Free) zip file. Click Install Now and then Active Plugin; see below for reference.
Once the above steps are complete, you’ll notice that from your WooCommerce Dashboard you will be able to click on WooCommerce Google Analytics Integration Settings, as shown in the below screenshot.
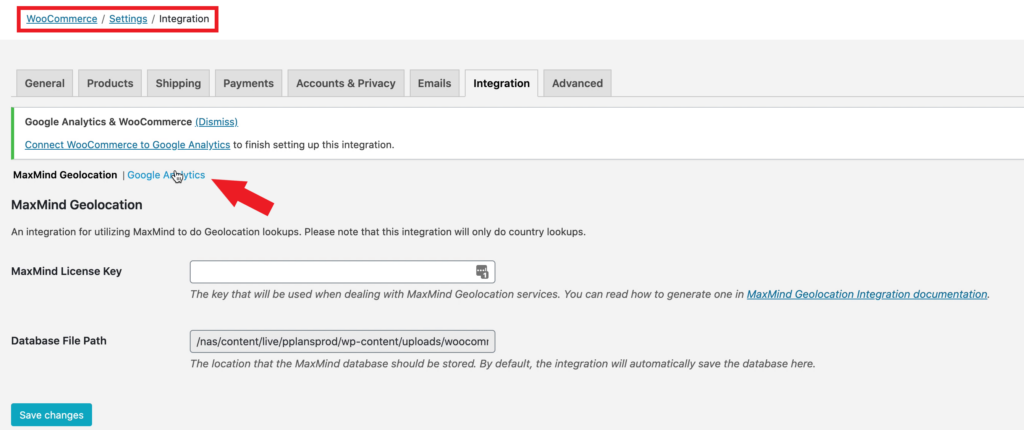
You should now be on a screen where you will be able to enter your Google Analytics ID.
Again, in order to navigate to this screen from your WooCommerce Dashboard, click on WooCommerce Google Analytics Integration Settings and then Google Analytics, as shown above.

Step 2: Fetching your Google Analytics ID
In order to fetch your Google Analytics ID, you will have to open a new tab on your web browser and visit analytics.google.com.
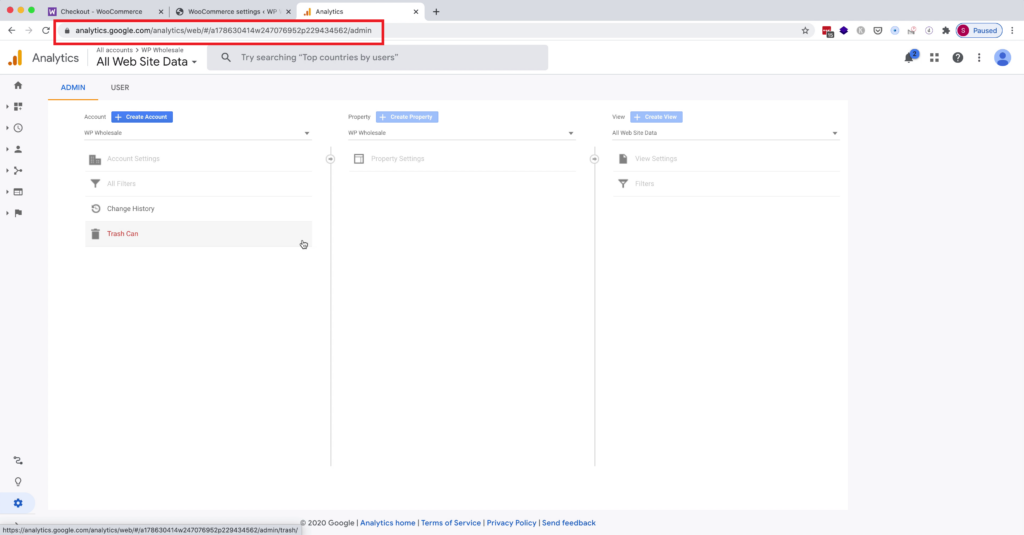
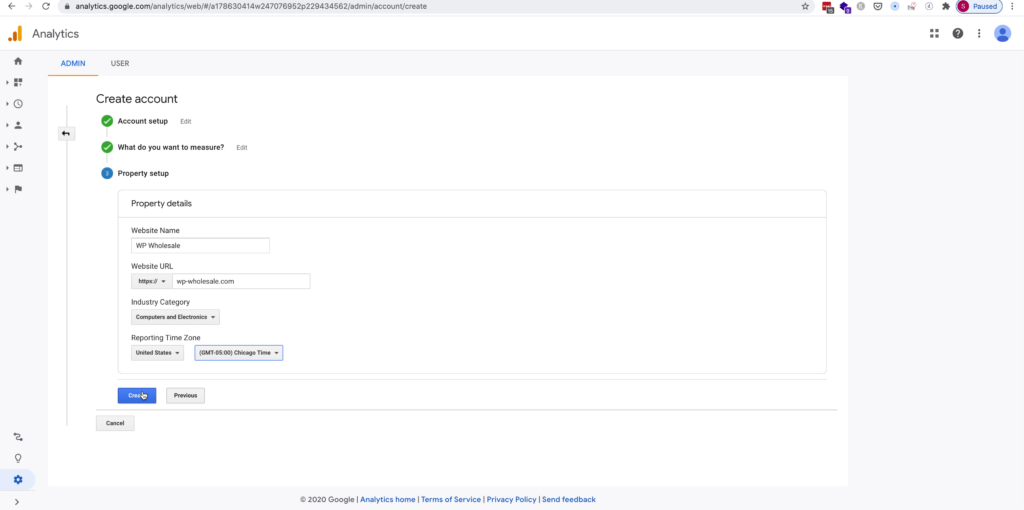
Once you are on the site, click on Create Account. The account setup process is fairly straightforward; below, you can see some of the settings that I have chosen for this example. If you are having a difficult time setting up your account be sure to check out the tutorial video!
Once your account has been created, you will be able to copy and paste the tracking ID as shown below:
It is worth noting that you will NOT have to do anything with the tracking code listed under “Global Site.”
Add your tracking code into the Google Analytics ID box on WooCommerce as shown below, and then be sure to click Save Changes.
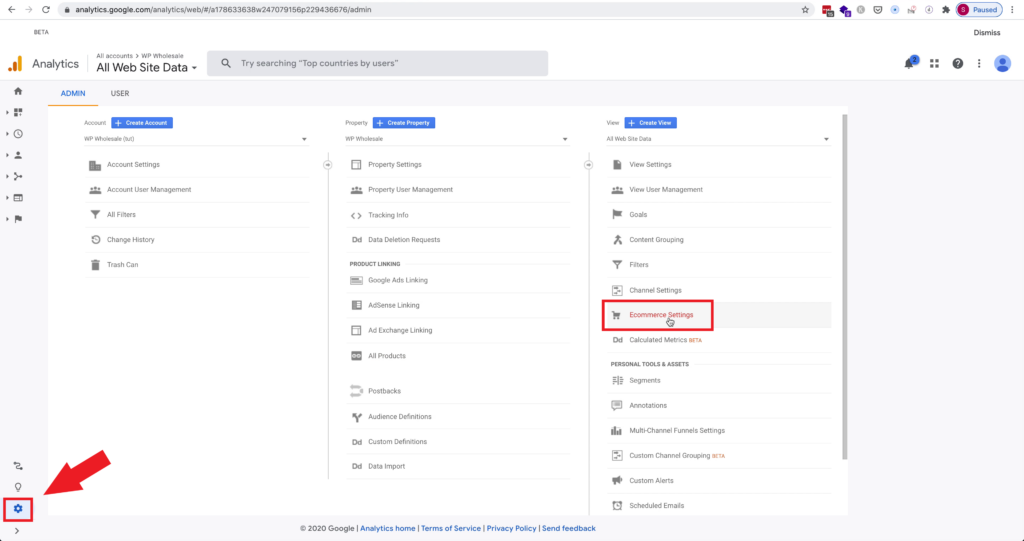
Step 3: Finalizing Ecommerce Settings
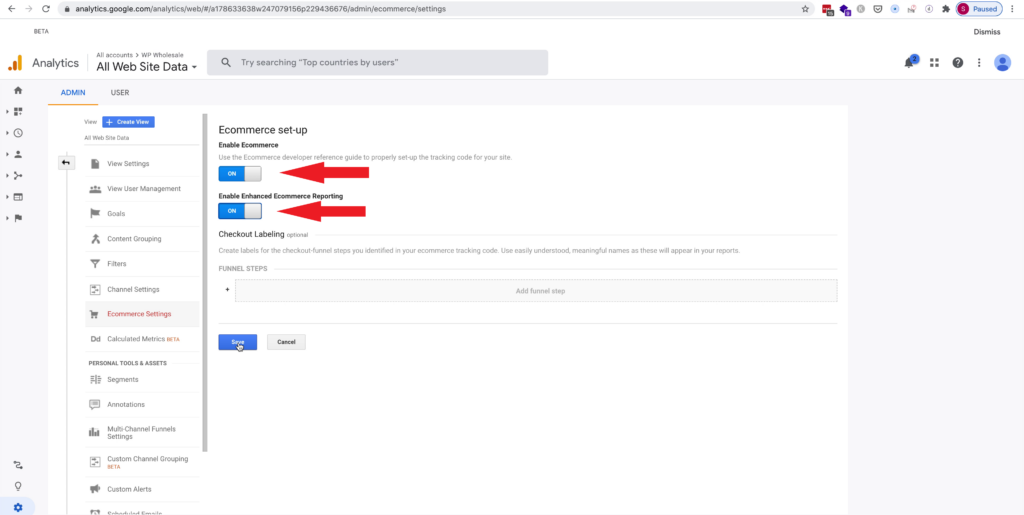
Before we leave analytics.google.com, there is one more thing that we need to do! Click on the gear in the bottom left handle corner of your screen and then select Ecommerce Settings. See the below screenshot for clarification:
Once you are under Ecommerce Settings, be sure to select Enable Ecommerce as well as Enhanced Ecommerce Reporting before clicking Save Changes.
Step 4: Configure the Google Analytics Plugin Settings
Once you are back on the Google Analytics Plugin Settings page from your WooCommerce Dashboard, you’ll want to set your domain main. This is optional but something that I personally find useful. Below you can also see the list of Tracking Options that I usually select and would recommend that you check as well if you are not already using a different 3rd party Google Analytics plugin.
In addition to the above Tracking Options, you’ll also want to check Enable Enhanced eCommerce since that is what we just finished setting up.
Step 5: Testing
In order to test everything to ensure that our installation and setup were successful you’ll want to navigate back to your Google Analytics account and click on Realtime and then Overview.
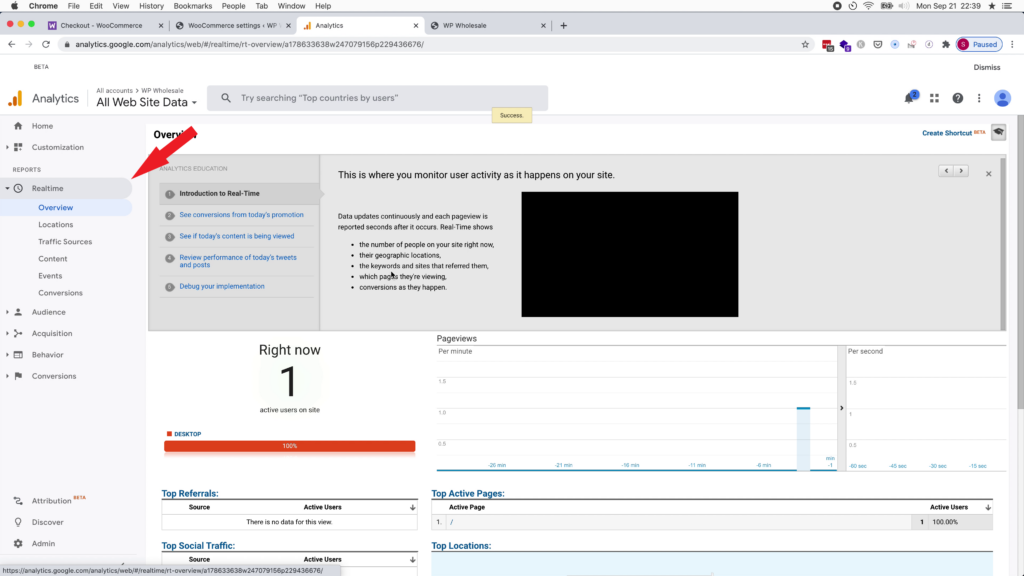
As you can see in the above screenshot, there is 1 active user on my site, which just happens to be a different tab that I have open on my desktop.
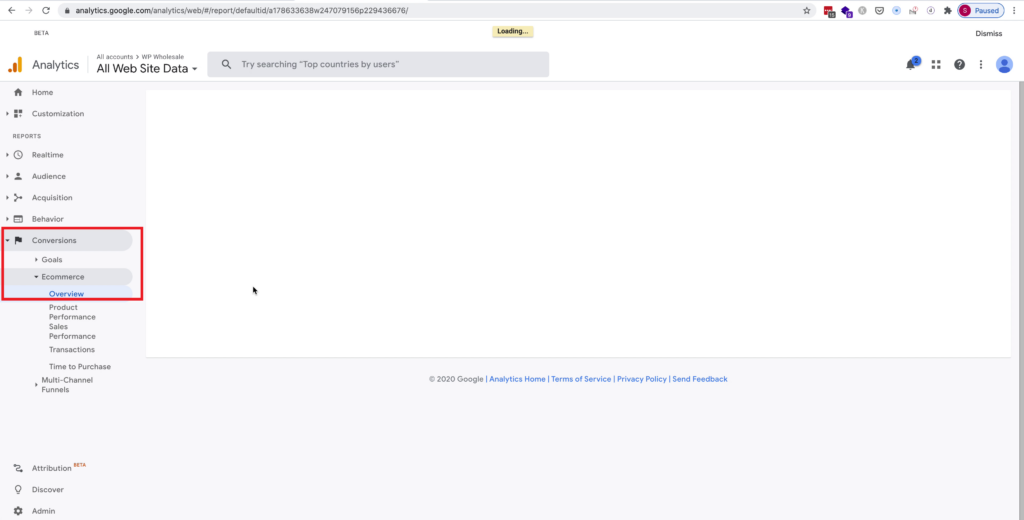
If you take the time to go through a test transaction, you will notice that Google Analytics tracks the customer activity which, you can view by clicking on Conversions, Ecommerce, and then Overview.
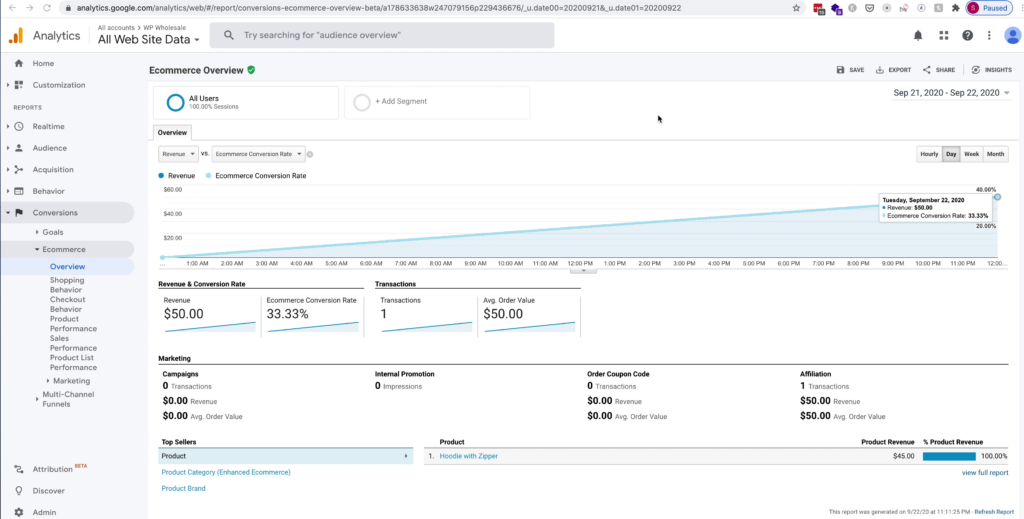
Please note you do need to wait up to 24 hours for a full readout of results from Google Analytics to show in your dashboard. After 24 hours, you will be able to see graphs and data such as average order price, number of transactions, and total revenue, as shown below.
You are now ready to start seeing the benefits of Google Analytics on your WooCommerce store!
We would highly recommend the WooCommerce Google Analytics (Free) Plugin as well as the WooCommerce Google Analytics Pro (Paid) Plugin, both of which can be downloaded from this article or from the description of our tutorial video!
Bonus: How to add a user to Google Analytics
You might need to provide your WooCommerce developer, SEO expert or friend access to your Google Analytics account!
Here’s how:
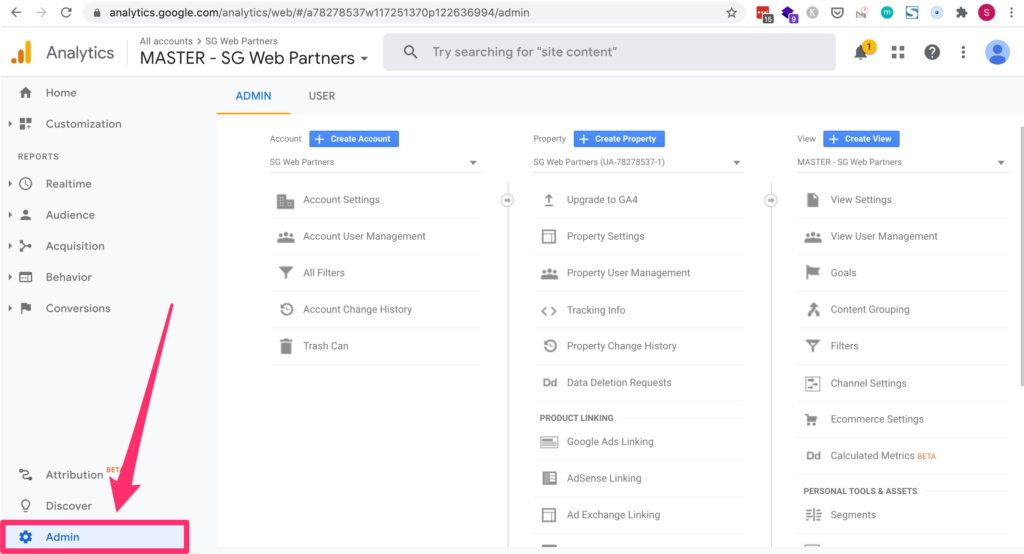
Go to your Google Analytics account and click Admin.
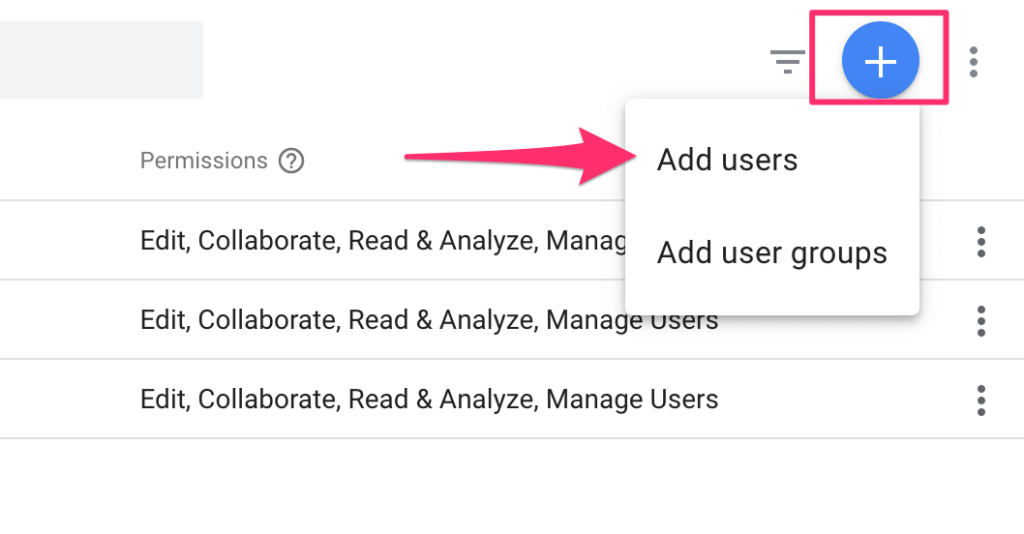
Next, click Account User Management.

Then, click Add users in the top right-hand corner.
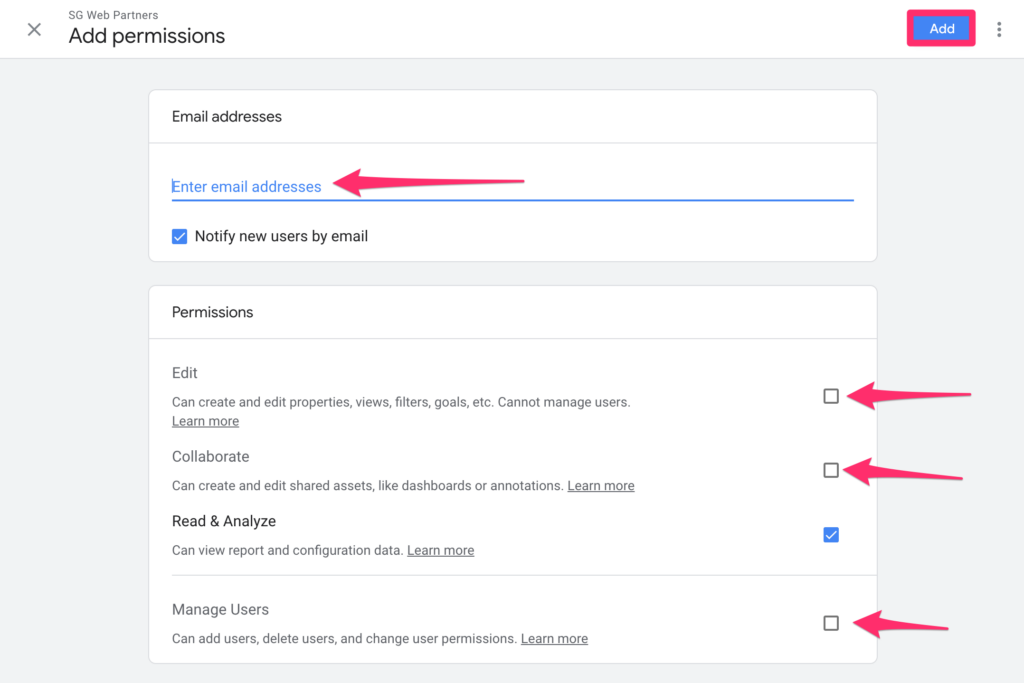
Finally, add the user’s email address and click Add.
All done!
Video Tutorial
WooCommerce Google Analytics Pro plugin (Advanced Tracking)
This video is for the WooCommerce Google Analytics Pro plugin.
Instead of making videos and write some huge content with very useful information but hope you aware that the all have to turn to GA4
I have an existing GA account but I ended up using multiple GA plugins on my woocommerce shop and am trying to slim it down now and remove these but I’m not able to locate the GA tag ID within GA as detailed in the screenshots and this guide.