
In this guide, learn how to setup Authorize.Net on your WooCommerce store.
If you have not created an Authorize.Net account yet, create a business account before proceeding.
You also need to get the Authorize.Net plugin from the WooCommerce marketplace.
If you are more of a visual learner, check out the video below!
Let’s jump into it!
Step 1. Enable Authorize.Net in WooCommerce
Download the Authorize.Net plugin from WooCommerce. Install and activate the plugin on your site.
Next, go to WooCommerce > Settings and click the Payments tab.
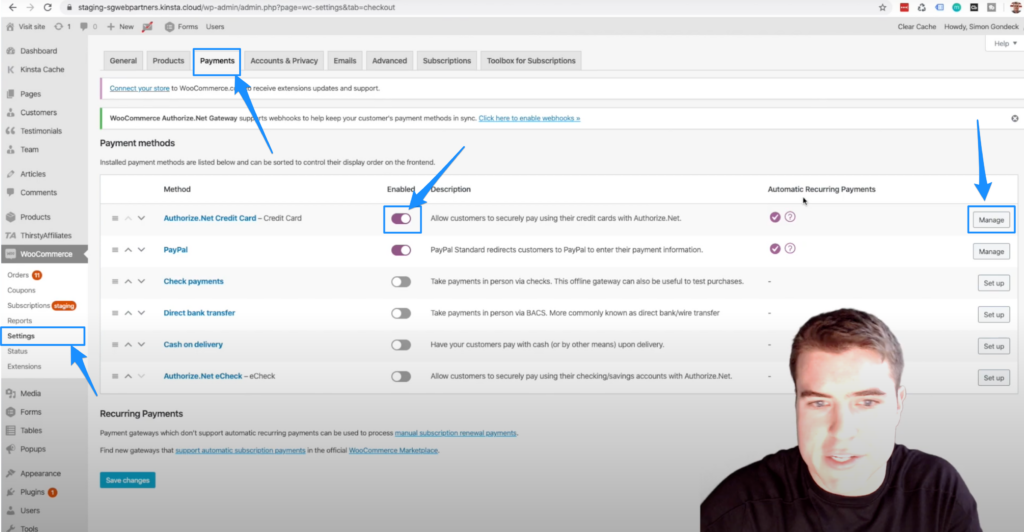
Then, enable Authorize.Net Credit Card and click Manage.
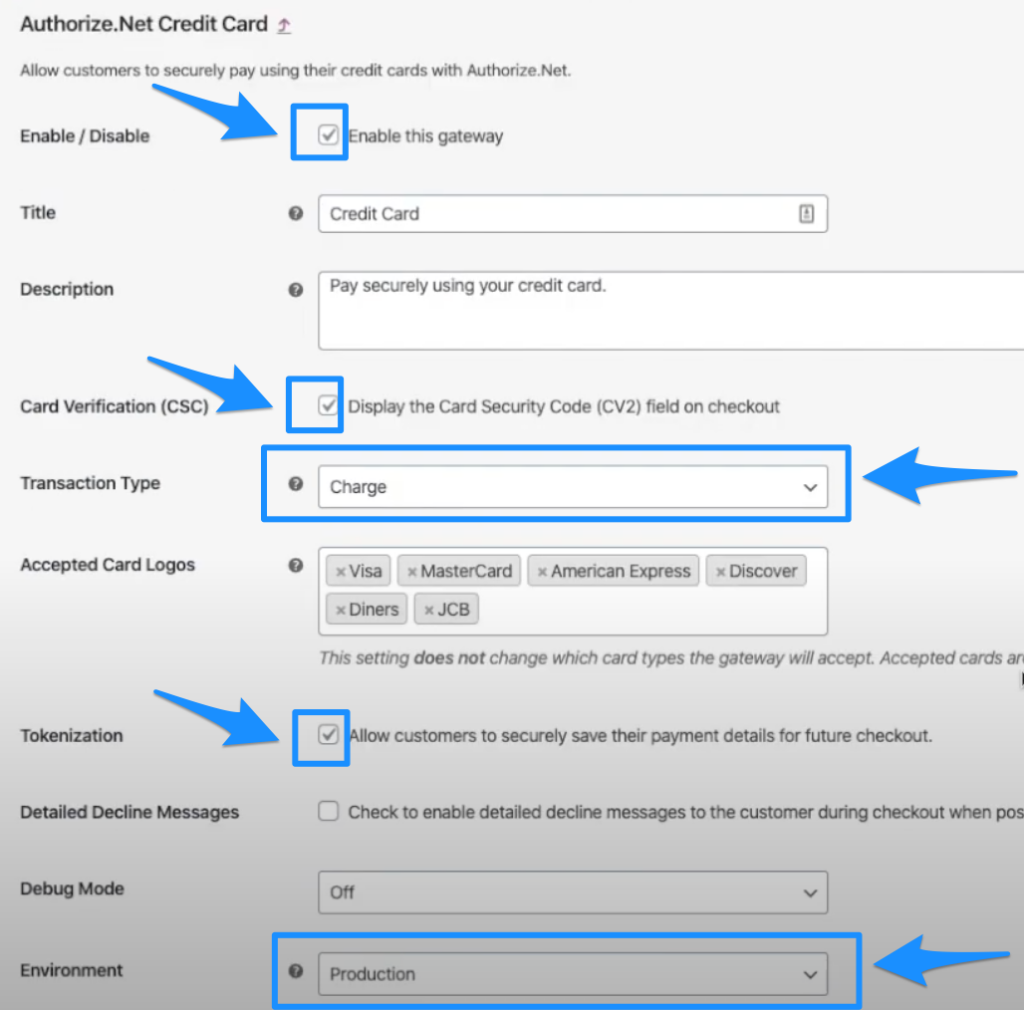
Next, click the checkbox to Enable this gateway, click the checkbox to enable Card Verification (CSC), select Charge from the Transaction Type dropdown, click the checkbox to enable Tokenization, and select Production from the Environment dropdown.
Step 2. Get Authorize.Net account keys
Next, we need to add in our API keys from Authorize.Net.
To get your Authorize.Net account keys, you will need to login to your Authorize.Net dashboard.
From the Authorize.Net dashboard, click Account > API credentials & Keys.
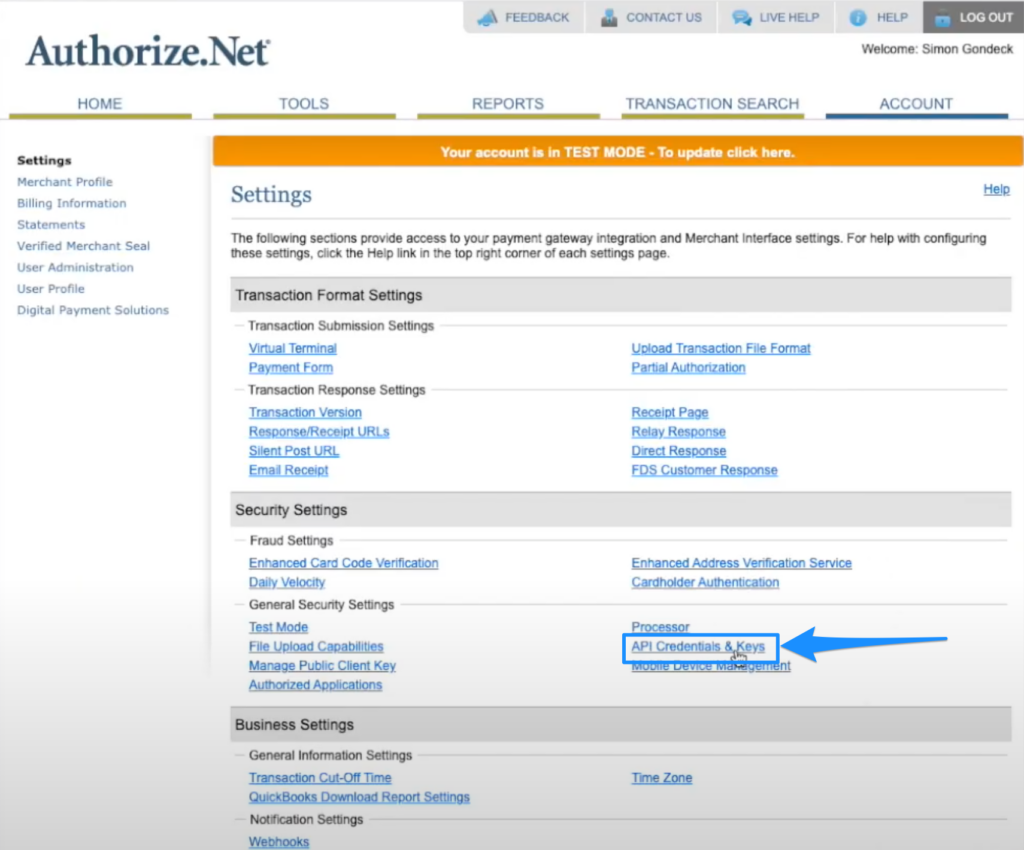
Then, you will be able to view your API Credentials & Keys.
First, copy the API Login ID in Authorize.Net and paste to WooCommerce.
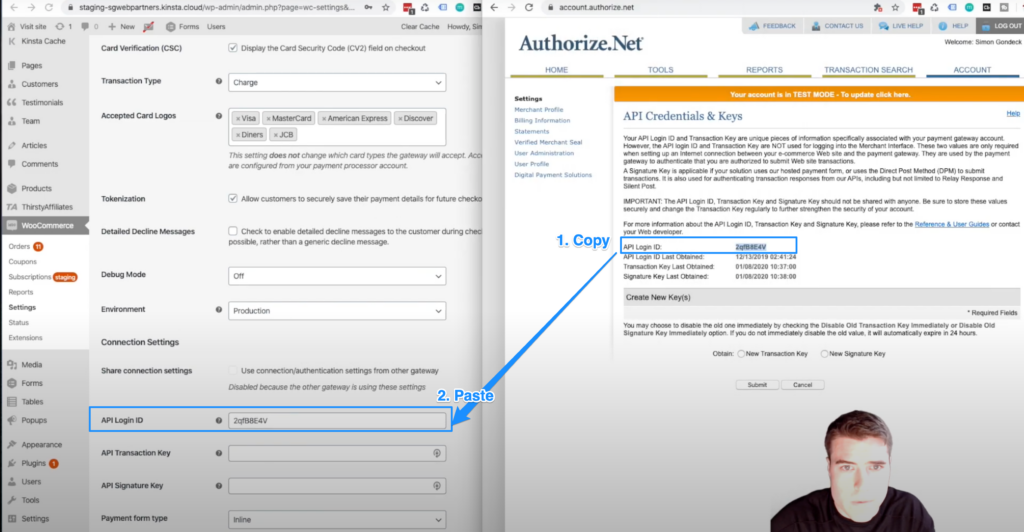
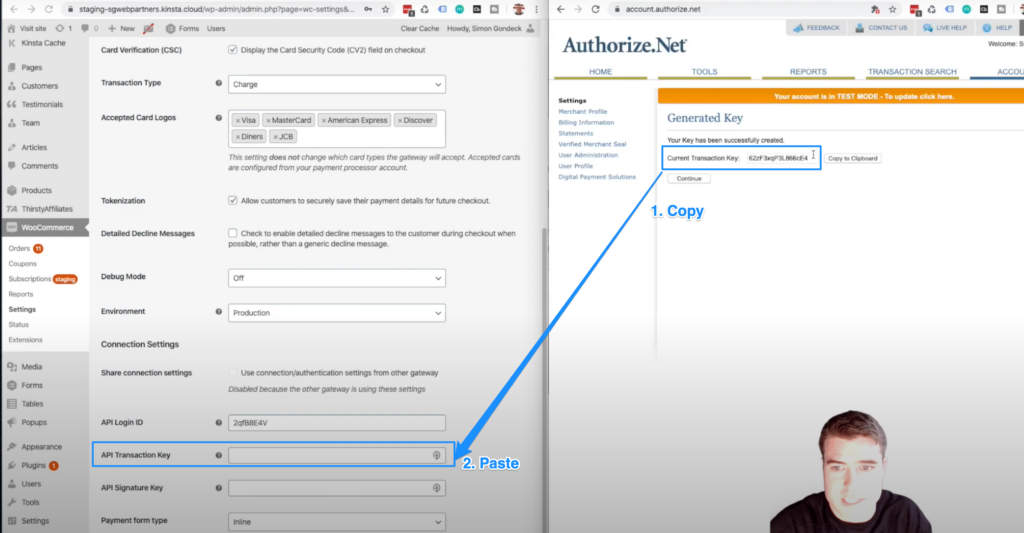
Next, copy the API Transaction key in Authorize.Net and paste this value in WooCommerce.
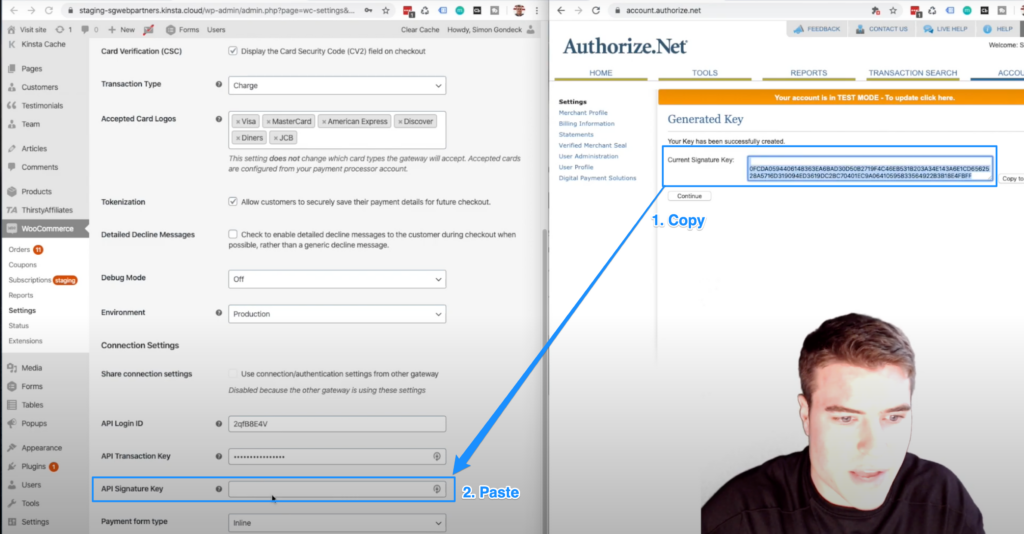
Finally, copy the API Signature key in Authorize.Net and paste this value in WooCommerce.
Just a heads up that if you have not used your Authorize.Net Transaction key for an extended period of time, Authorize.Net may require you to regenerate a new key.
Lastly, don’t forget to scroll to the bottom of the page and save your changes in WooCommerce.
You did it!
In the next step we will do a live transaction to make sure everything is working.
Step 3. Test that Authorize.Net is working
Finally, do a live transaction on your site using Authorize.Net as your payment method. I recommend setting a product to $1 and doing a real test with a real credit card! After your test you can just update the product back to $1.
You could also setup a sandbox account if you want to do more testing!
Quick Tip: If you do not see the Authorize.net payment option, you may also have to clear your cache. Also, make sure you are using the official WooCommerce Authorize.net plugin. If still having issues please leave a comment.
How to setup Authorize Net Sandbox Account?
Creating a sandbox account with Authorize.Net allows you to do test orders on your WooCommerce store. The sandbox functions like the production environment but no actual card payments are processed.
Quick Tip: you will need the Authorize.net plugin to test sandbox mode.
Step 1: Enable test mode in WooCommerce
Go to WooCommerce > Settings > Payments > Authorize.Net and make sure the gateway is enabled.
Switch the Environment to Test.
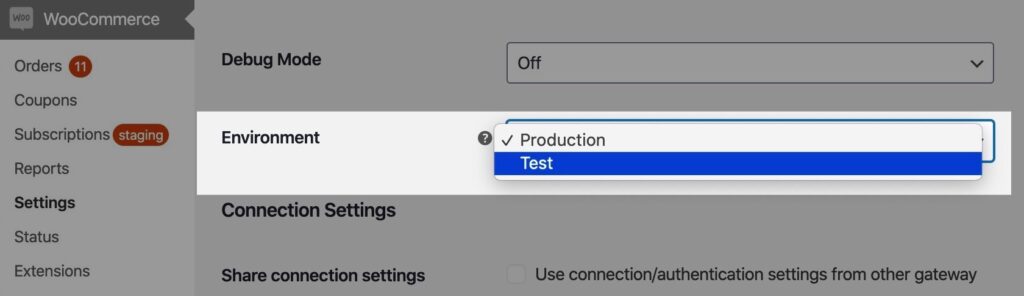
Save changes.
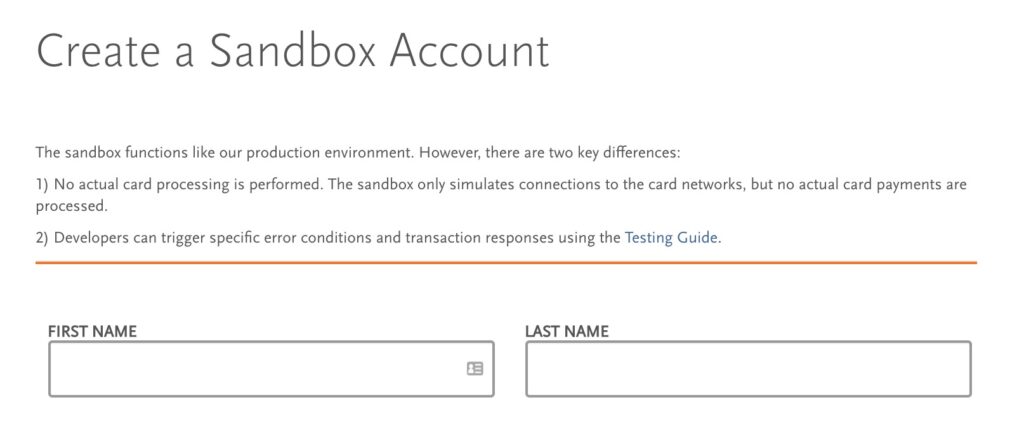
Step 2: Create your sandbox account
Create a sandbox account and go through the sign up process. Takes 15 seconds and they do not ask you much.
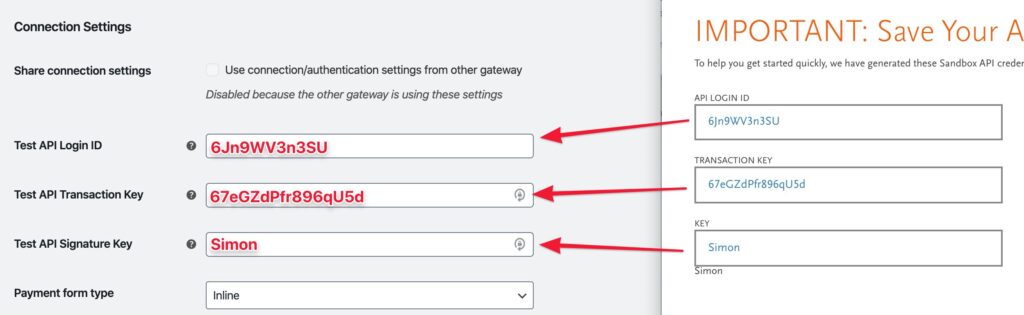
After creating your account copy your API keys. We will need them in the next step.
Quick Tip: if you end up forgetting your API credentials or the email address you used, do not worry. You can always create another sandbox account if need be.
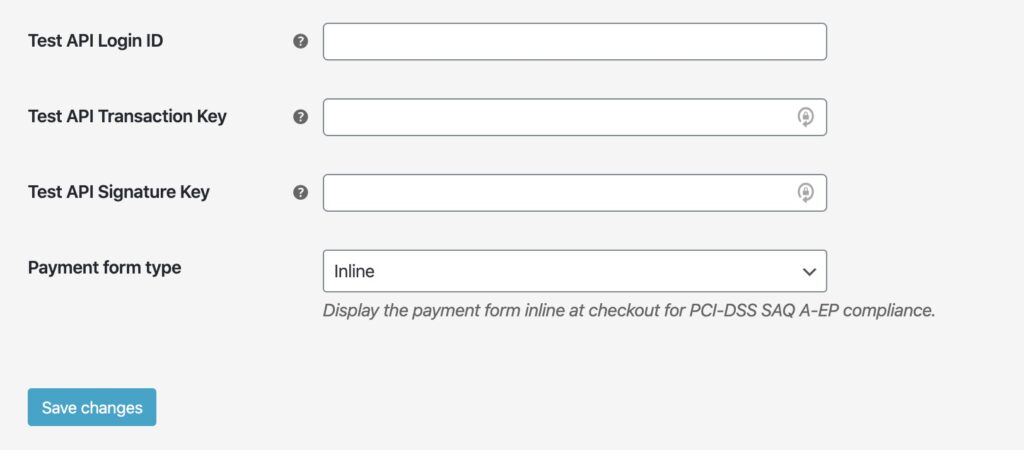
Step 3: Paste your Sandbox API credentials in WooCommerce
Copy your Sandbox API credentials to your WooCommerce site. Save changes.
The easiest way to do this is to split your screen like in the screenshot below.
Now you will be able to do test transactions on your WooCommerce store!
Step 4: Do a test transaction on your site
Go to the frontend of your WooCommerce site or open up an incognito window to simulate how a customer would go through the purchase process on your site.
Add a product to your Cart and go through the Checkout process.
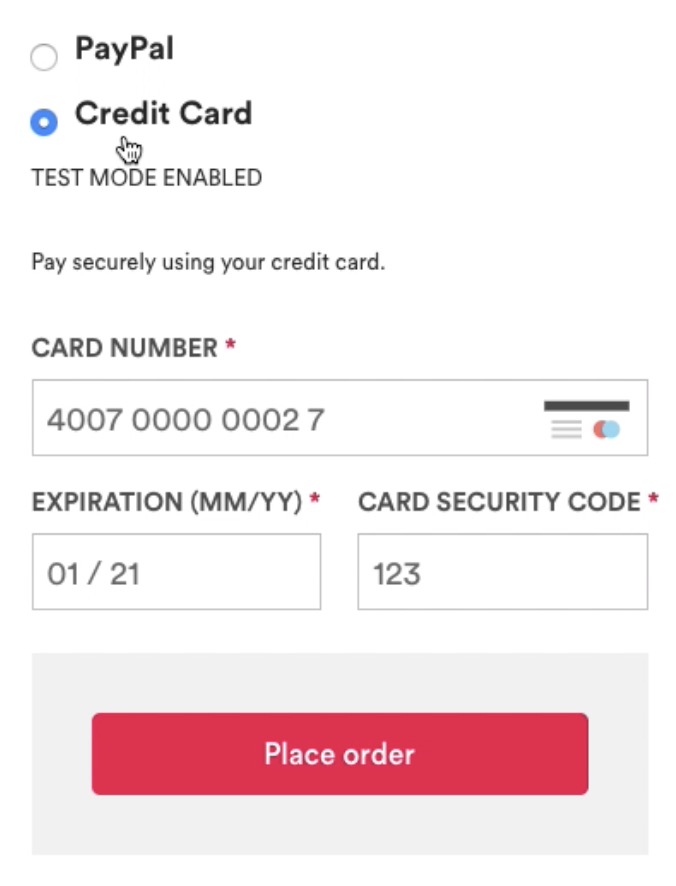
Reference the docs for test credit card numbers that work in sandbox mode. I also provided examples below of test credit card numbers that work. You also could look at the sandbox docs as well.
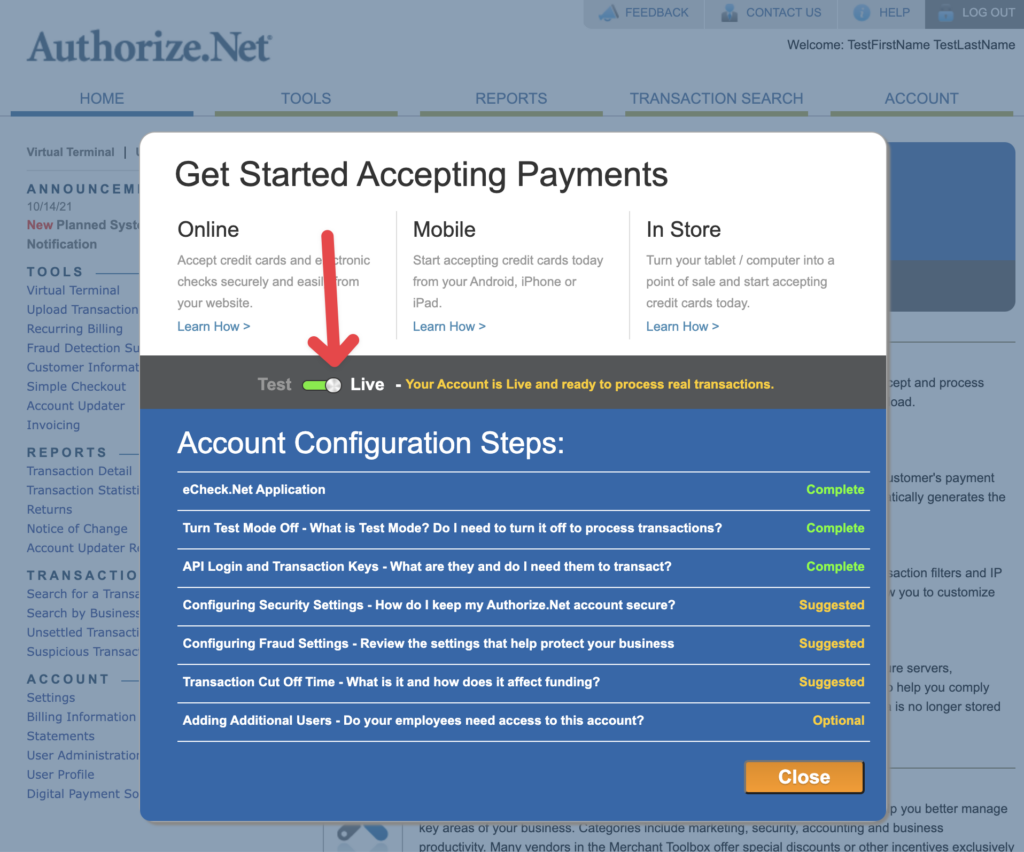
If you see an error during test make sure your sandbox account is toggled to Live instead of Test.
Visa example (3-digit CVV code)
Card number: 4007000000027
Expiration: 01/21
Card Security Code: 123
American Express example (4-digit CVV code)
Card number: 370000000000002
Expiration: 08/25
Card Security Code: 1111
Video Tutorials
If you are having trouble, follow along to the video tutorials below.
how do you set up webhooks? I can’t figure out what the endpoint URL to put in authorize.net to make it work. I get an error when I click the button in woocommerce that says create webhooks