How to setup Square in WooCommerce?

In this guide, learn how to setup Square payment gateway on your WooCommerce store.
Before we begin you need to make sure that you have downloaded the official Square plugin from the WooCommerce marketplace.
Ensure this plugin is installed, active, and setup correctly!
If you are more of a visual learner check out the video I created below.
Let’s jump into it!
Table of Contents
How to setup Square on WooCommerce?
1. Connect your site to Square
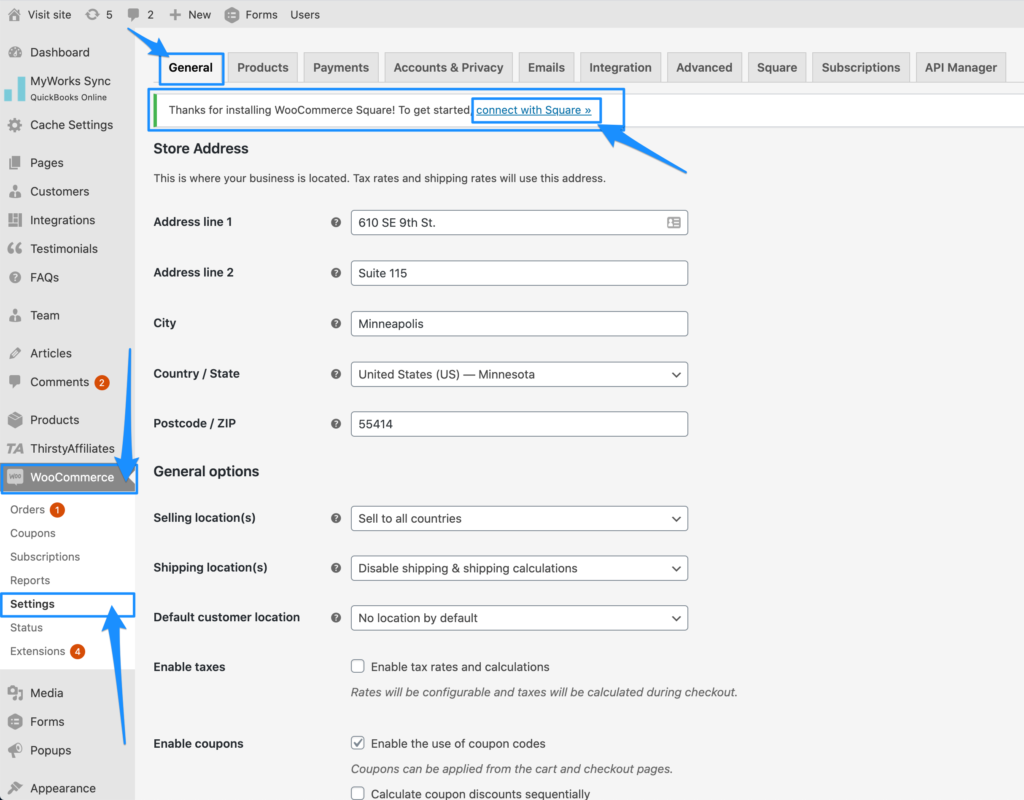
To begin using WooCommerce Square, you first need to connect your site to Square. First, navigate to your WordPress dashboard, hover over WooCommerce, and go to the Settings.
Next, make sure the General tab is toggled.
Finally, click connect with Square underlined text.
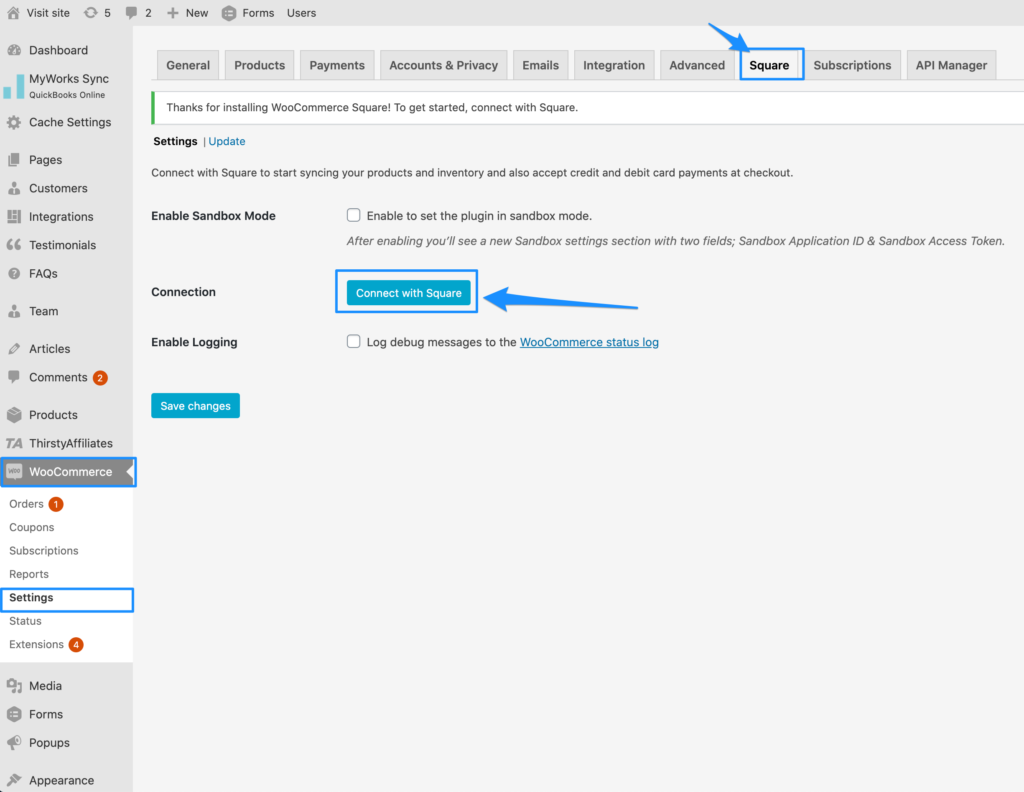
Next, you will be brought to the Square tab. From here, select the blue button that says Connect with Square.
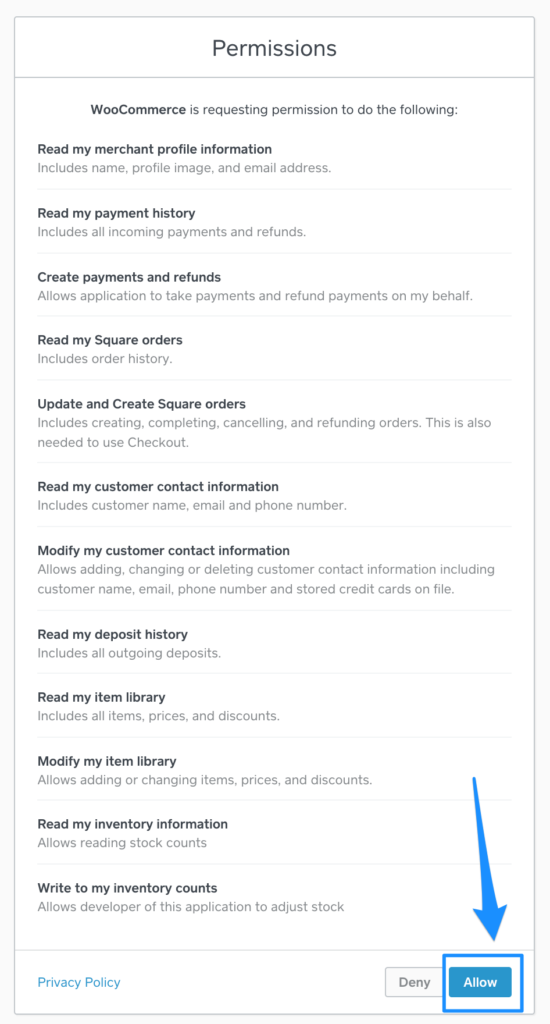
To connect your site to Square, you will need to login to your Square account. You will be brought to the square login page and after signing in, to the permissions screen. Click allow on the permissions screen.
Congrats, you have just authenticated Square on your WooCommerce site. Click Redirect Me to navigate back to your site.

Now, you will be able to configure the Square settings from WooCommerce. Make sure to select what Business location and Product system of record you would like to choose, as well as enable Sync inventory and/or Handle missing products.
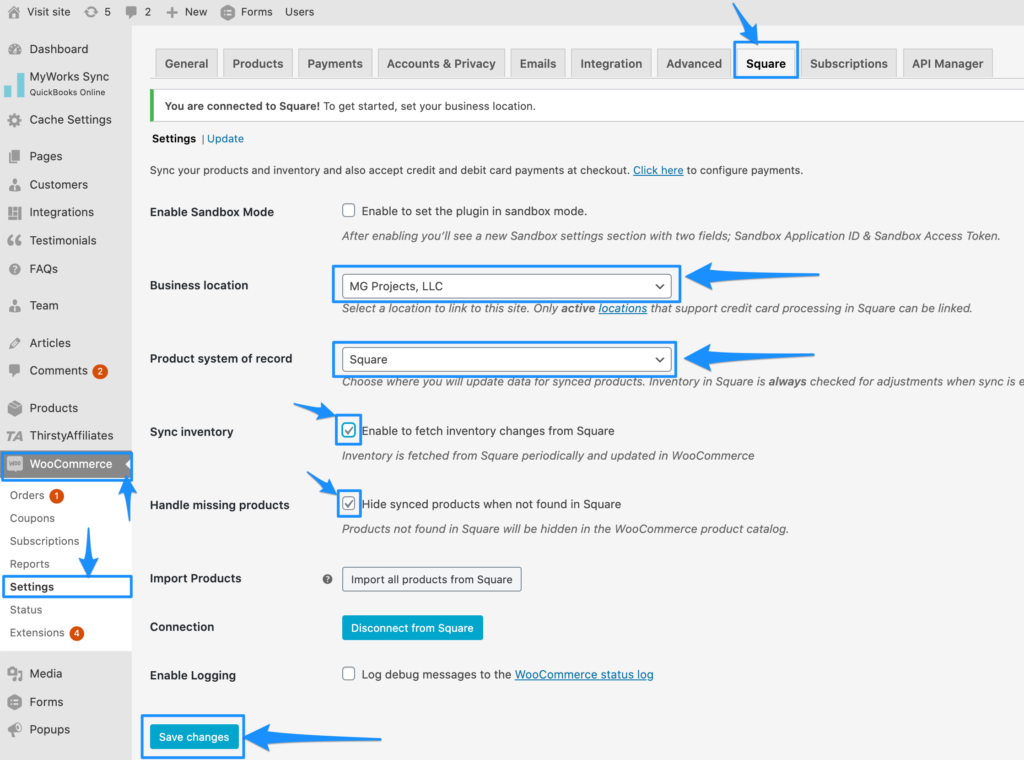
Don’t forget to click ‘Save Changes’ in WooCommerce.
2. Enable Square in WooCommerce
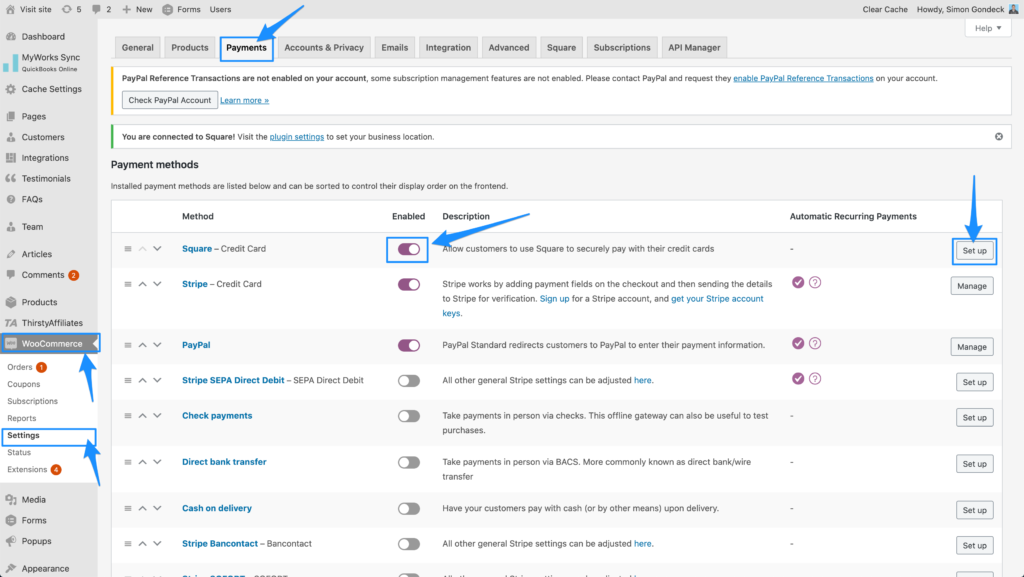
The first step is to go to your WordPress dashboard, hover over WooCommerce, and go to the Settings.
Next, click the Payments tab.
Finally, click the checkbox to enable Square Payment Method and click Set up.
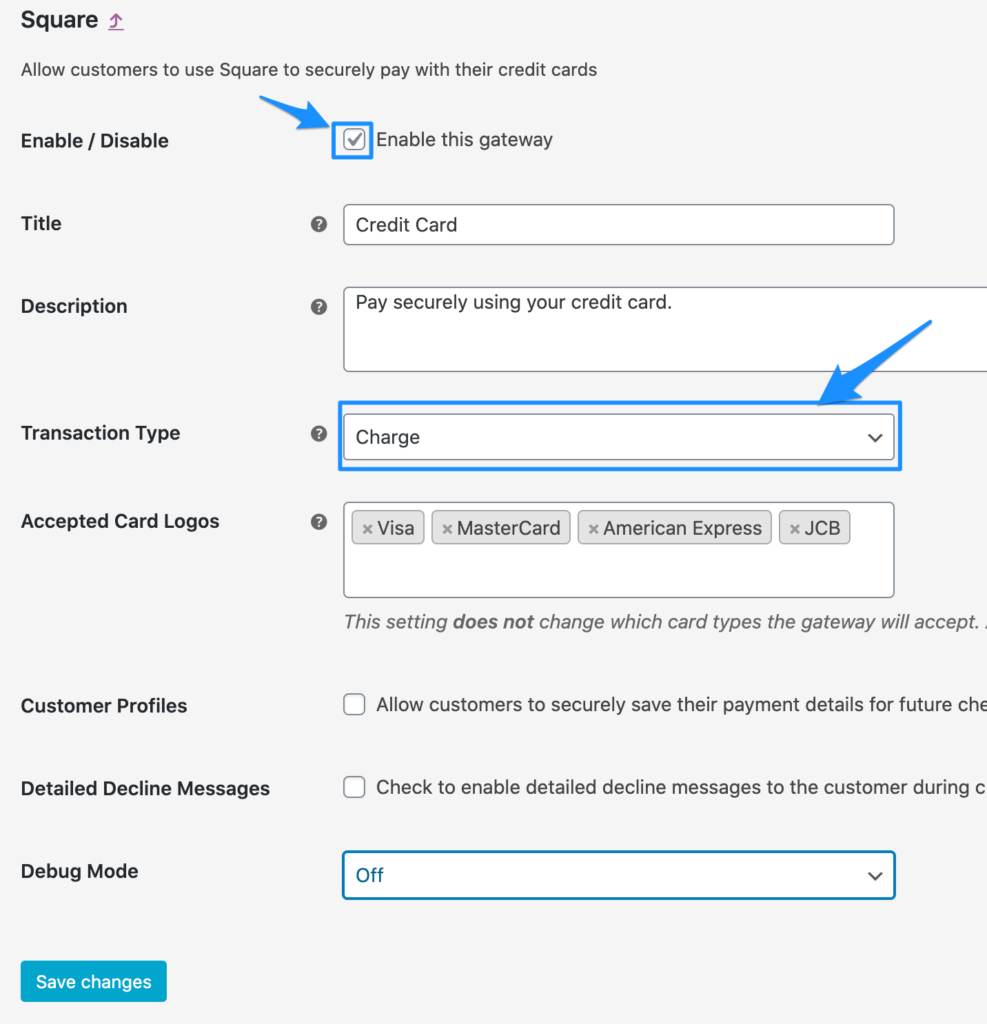
Next, click the checkbox to enable the Square Payment Gateway, select ‘Charge’ from the Transaction type dropdown, and don’t forget to click ‘Save Changes’ in WooCommerce.
3. Test that Square is working
Finally, do a live transaction on your site using Square. Open up a browser on your phone or computer and go to your website and add one of your products to Cart.
You should see the option to pay with a credit card.
If you do not see this option, you may also have to clear your cache.
Pro tip: Update 1 product in your store to be $1 and do a real transaction using Square to make sure everything is working!
How to setup Square sandbox account on WooCommerce?
On your WordPress dashboard, hover over WooCommerce Settings.
Next, click the Square tab.
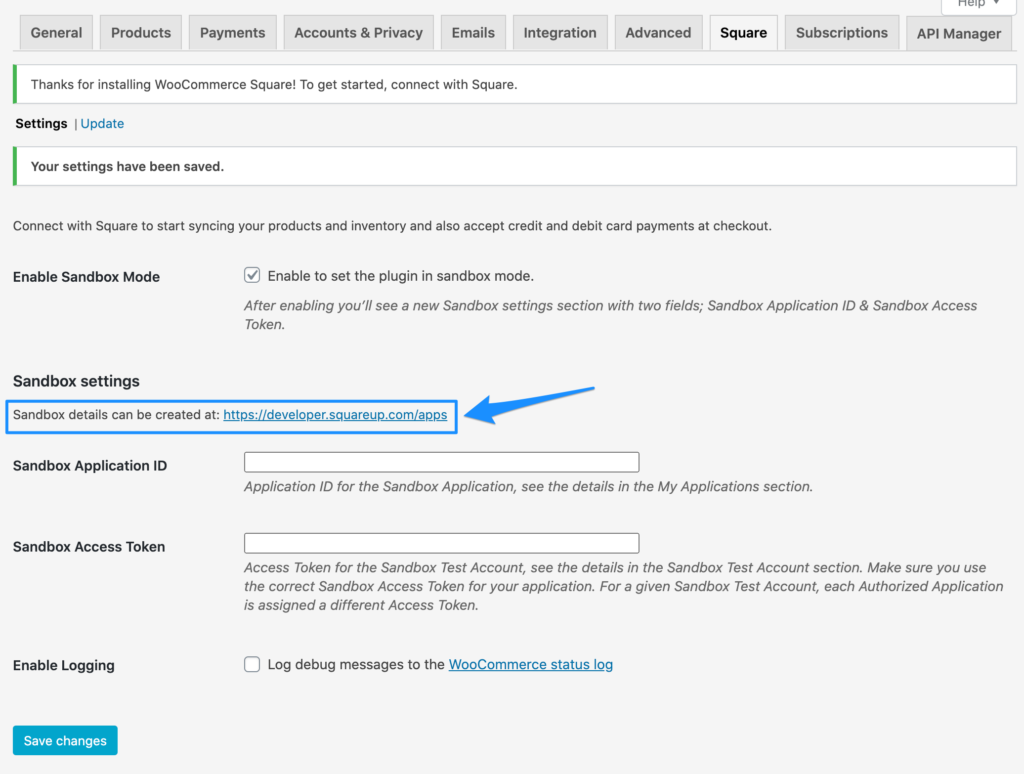
Under Enable Sandbox Mode click “Enable to set the plugin in sandbox mode”.

After enabling sandbox mode, scroll down to your Square settings page, you will notice we need to insert our Sandbox Application ID and Sandbox Access Token. To get these we need to create a Square Sandbox account by first creating a Square Developer account.
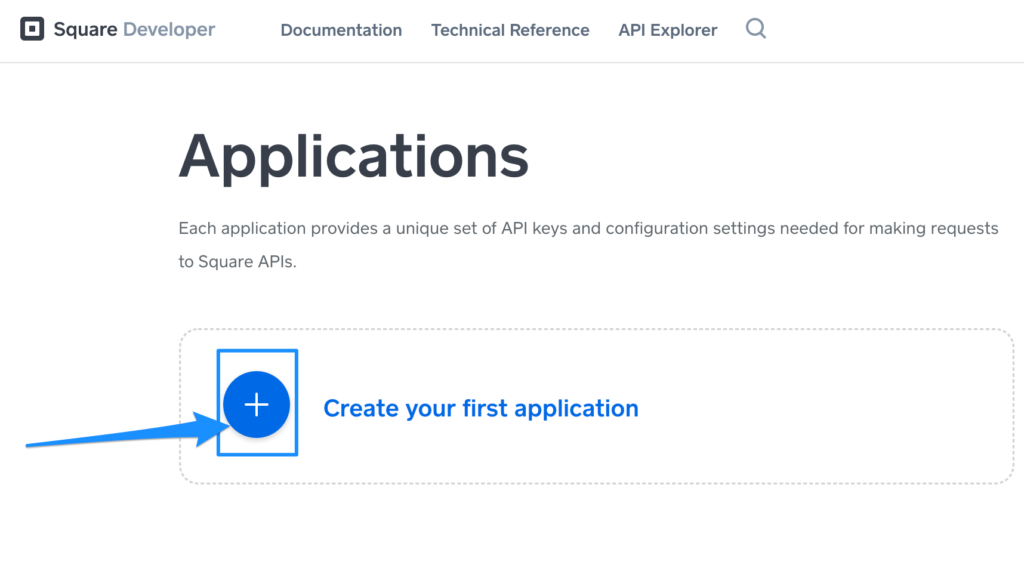
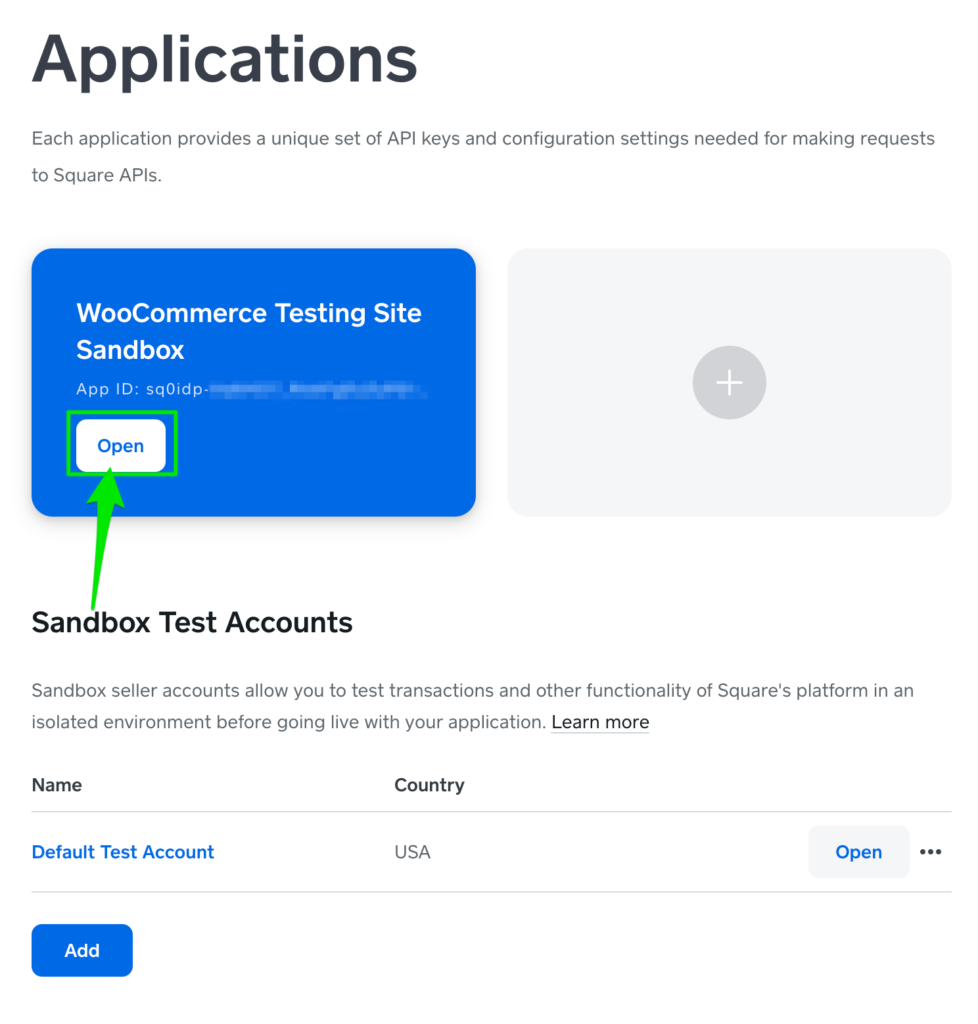
On your Square Dashboard, click the plus icon to create a new app, name your app (i.e. I named mine ‘WooCommerce Testing Site Sandbox’), and then. click save.
Next, click Open and should. be able to see your Sandbox Application ID and Sandbox Access Tokens.
Next, copy and paste the new Sandbox Application ID and Sandbox Access Token into your WooCommerce Square settings.
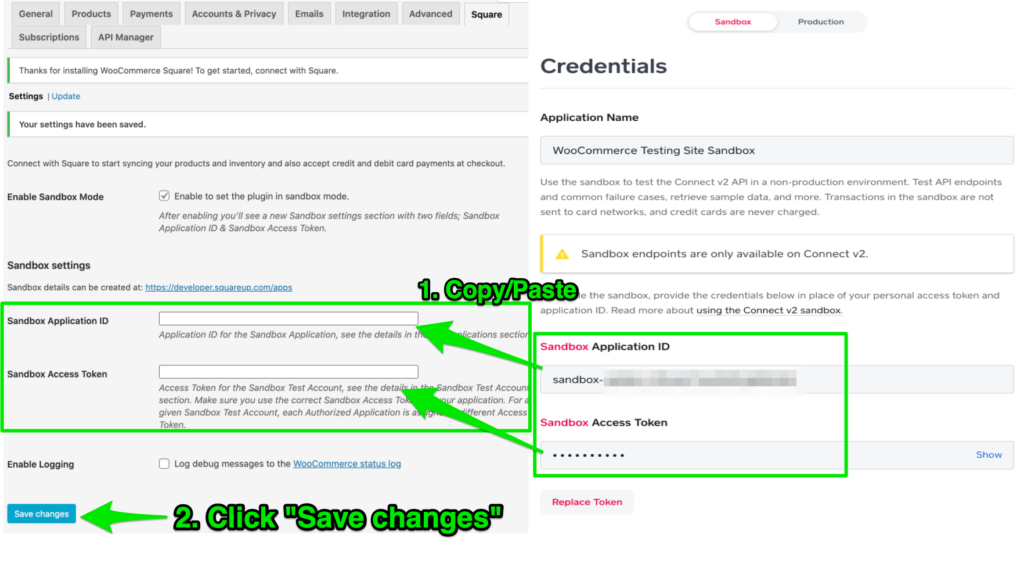
Click Save changes.
Finally, be sure to set the Business Location to ‘Default Test Account’.
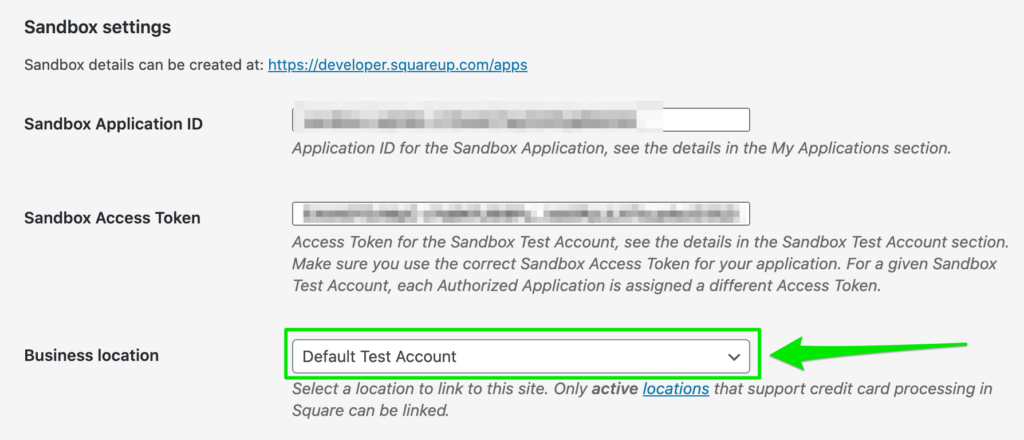
Your Square sandbox account is all set up.
Video Tutorial
Additional Resources
FAQ
What credit cards are accepted with Square?
Square works with any US-issued and most internationally-issued magstripe or chip cards incluuding Visa, MasterCard, Discover Discover, American Express, UnionPay logo, and JCB.